How to replace a toilet shutoff valve safely
Replacing a toilet shutoff valve is a 30–60 minute repair most homeowners can handle themselves — if the pipe is in decent shape and the old valve hasn't been frozen in place by decades of corrosion. The job comes down to shutting off your water supply, disconnecting the old valve, swapping in a new one, reconnecting the supply line, and confirming there are no leaks. That's it, when conditions cooperate.
The part that separates a smooth swap from a plumber call isn't the skill — it's the condition of what's already there. A seized compression nut, a corroded stub-out (the short section of pipe coming out of the wall), or a soldered valve changes the calculus entirely. This guide gives you a clear stop/go framework before you loosen a single fitting.
At a Glance: - Time: 30–60 minutes under normal conditions - Skill level: Beginner — comfortable using an adjustable wrench and working in a tight space - Valve cost: $10–$30 for a standard quarter-turn ball valve at most hardware stores - Pro cost: Homewyse's May 2026 national average starts at $277–$333 per valve installed - Start only after: Fixture water is fully isolated and the toilet tank is drained
One firm rule before you touch anything: the water to the toilet must be shut off and the tank must be drained before you loosen any fitting. There is no safe workaround for this step.
Pro Tip: SharkBite's installation guidance says, "Cut the pipe as cleanly and squarely as possible. Ensure the pipe is free of scratches and debris."
Toilet shutoff valve replacement tools, parts, and time estimate
Gather everything before you crouch behind the toilet. Once you've disconnected the old valve, you don't want to make a hardware store run with a stub-out dripping onto your bathroom floor.
The shutoff valve itself will usually run $10–$30 for a quality brass quarter-turn ball valve, with SharkBite push-to-connect valves as a common no-solder option if the pipe material is compatible. Supply line replacement adds another $8–$20 for a braided stainless steel line. Do the math: the DIY parts cost is typically under (50, compared to Homewyse's May 2026 national average of )277–$333 for a plumber to do the same job.
That gap makes this repair worth attempting if conditions are right. But don't let the cost savings push you past the stop signs covered later in this article.
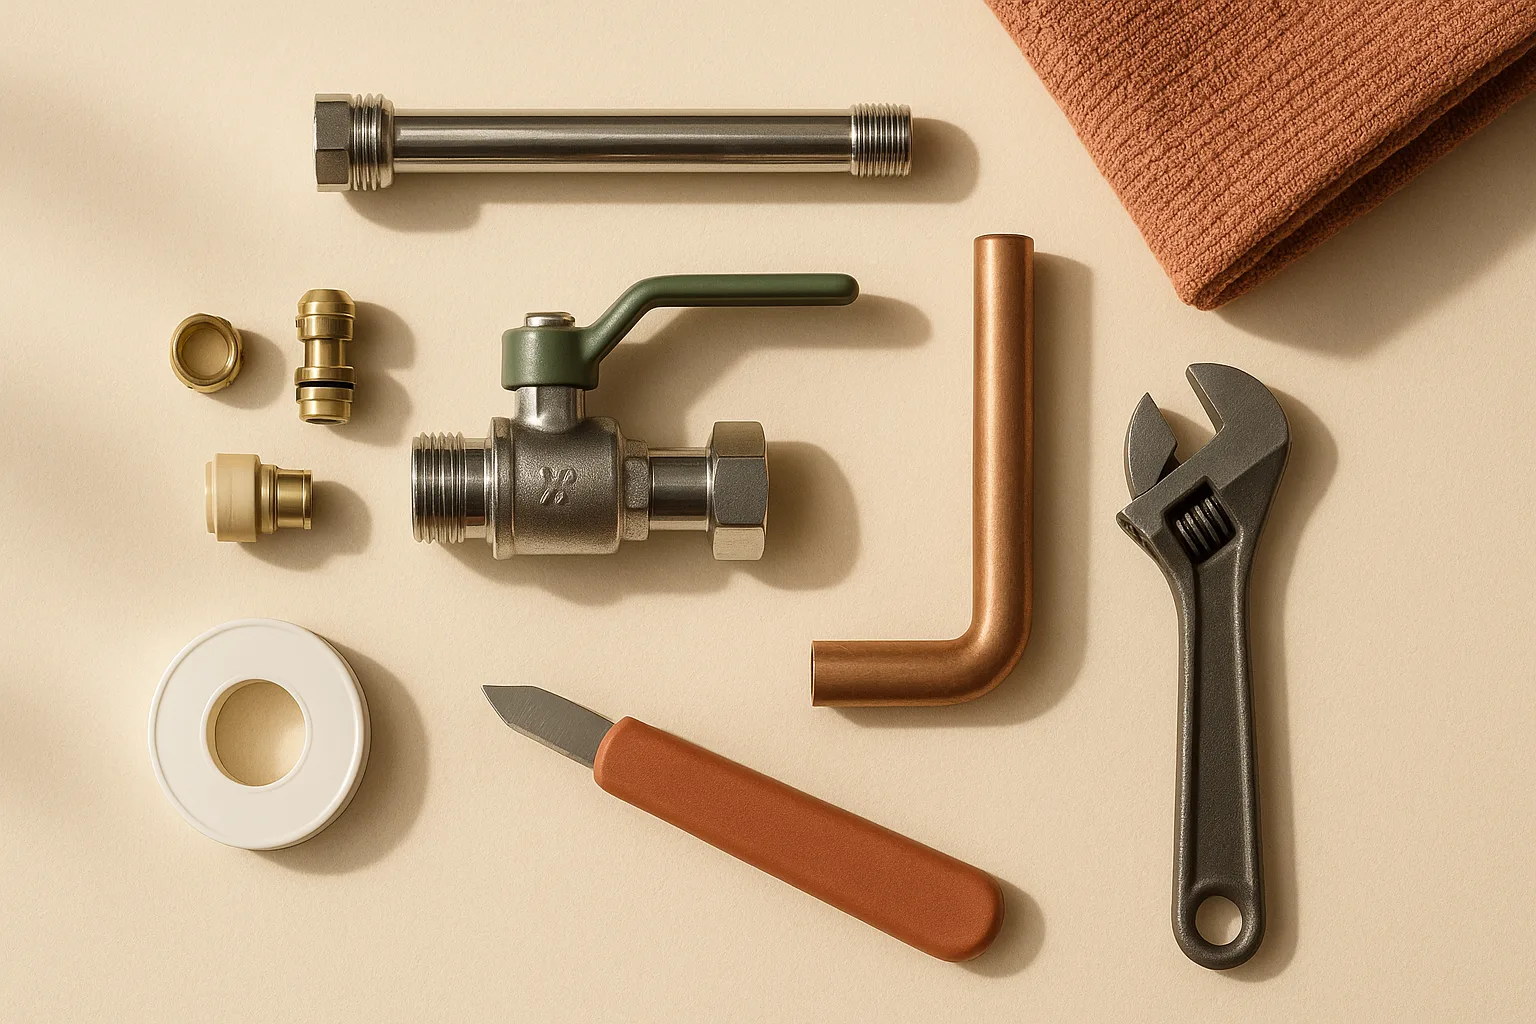
Tools you'll need for the repair
- Adjustable wrench — for compression nuts and supply line connections
- Basin wrench — the long-handled tool with a swiveling jaw that reaches into the tight space between the toilet tank and the wall; you may not need it on every toilet, but you'll want it available
- Bucket or large bowl — positioned under the valve before you disconnect anything
- Old towels or shop rags — for soaking up residual water in the supply line and tank
- Sponge — for removing the last inch of water from the tank bottom
- Utility knife — useful for trimming packaging or cleaning minor burrs from a pipe end; not for cutting finished pipe (use a pipe cutter for that)
- Slip-joint pliers — backup grip on stubborn plastic fittings
- Pipe cutter (optional) — if you need to cut back a corroded or damaged stub-out for a push-to-connect installation; SharkBite's installation guidance says, "Cut the pipe as cleanly and squarely as possible. Ensure the pipe is free of scratches and debris."
Pro Tip: A headlamp beats a flashlight every time behind a toilet. Both hands stay free, and you can actually see the compression nut threads.
Replacement parts to buy before you start
Match your new valve to the existing connection type. Buying the wrong fitting means a second hardware store trip.
- New shutoff valve — a quarter-turn ball valve is the standard upgrade from older multi-turn globe valves; specify the connection type (compression, push-to-connect, or sweat) and the pipe size (most residential toilets use 1/2-inch copper or CPVC supply coming out of the wall, with a 3/8-inch OD compression outlet going to the toilet). A concrete example: the SharkBite 1/2-in compression × 1/4-in OD compression quarter-turn valve is a common shelf option at Lowe's
- New ferrule (compression ring) — if you're installing a compression-style valve, buy a spare brass ferrule in the correct size; the old one is usually deformed after removal and can't be reused reliably
- Braided stainless steel supply line — 12-inch is the standard toilet length, but measure your existing line before buying; match the inlet fitting (3/8-inch compression for most toilets). Lowe's toilet/faucet supply line category lets you filter by inlet fitting type so you buy a compatible line
- Teflon tape — a few wraps on threaded connections help seat fittings cleanly
Watch Out: Don't buy a sweat (soldered) replacement valve expecting to install it yourself unless you're trained and licensed. Sweat connections require a torch, flux, and solder — and a mistake means a flooded bathroom or a connection that leaks inside the wall.
How to shut off the water and drain the toilet supply line
You cannot replace a toilet shutoff valve without shutting off the water first — and in most cases, you'll be shutting off the toilet's own valve to do so. That's the problem: the valve you're replacing is your first line of isolation. If it won't close fully, you move up to the main house shutoff.
To answer the PAA question directly: No, you cannot safely replace a toilet shutoff valve without shutting off water somewhere upstream. Your two options are (1) the toilet's existing shutoff valve, if it still closes fully, or (2) the home's main shutoff, which is the reliable fallback when the toilet valve won't seat.
Safe isolation sequence: 1. Try turning the toilet shutoff valve clockwise until it stops. If it's a multi-turn globe valve, count turns until it's fully closed. If it's a quarter-turn ball valve, the handle should be perpendicular to the pipe when closed. 2. Flush the toilet and watch the tank. If the tank refills, the valve is not seating — go straight to the main house shutoff. 3. Locate your main shutoff (typically near the water meter, in a utility room, or in the crawlspace) and close it. 4. Open a lower-level faucet — a bathroom or laundry sink on the ground floor or basement — to bleed pressure from the lines. This prevents a pressurized burst of water when you disconnect the supply line.
Confirm the toilet water is fully isolated
Before loosening anything, verify the isolation is reliable. Flush the toilet after closing the valve. The tank should not refill at all. If it refills even slowly, the valve is passing water and you need to use the main shutoff instead.
Per EPA WaterSense guidance, turn off the home's shutoff valve and wait 5 to 10 minutes; pressure should remain constant, and a pressure drop indicates a leak or a valve that isn't fully seated. Practically speaking at the toilet: if the fill valve stays silent and the water level in the bowl doesn't change after the flush, you have a good shutoff.
Drain the tank and supply line without flooding the floor
With the water confirmed off, remove as much water as possible before disconnecting the line.
- Flush the toilet to empty the tank. Hold the handle down to drain as much as possible.
- Remove the tank lid and set it somewhere safe — tank lids are ceramic and expensive to replace.
- Use a sponge to soak up the remaining inch or two of water from the tank bottom. Wring it into the bowl.
- Place your bucket directly under the shutoff valve before you touch the supply line connection. There will be residual water in the line — typically a cup or two — and it will run out the moment you loosen the fitting.
- Keep towels ready around the base for drips you didn't anticipate.
How to remove a toilet shutoff valve by connection type
This is where most guides leave you guessing. Identifying your valve type before touching a wrench determines whether this is a 20-minute swap or a plumber call. Look at where the valve meets the pipe coming out of the wall — that connection tells you everything.
[Image: Connection type identification diagram — compression fitting showing ferrule ring, sweat/solder showing silver solder bead, push-to-connect showing collet ring at valve body]
Three connection types:
| Type | What it looks like | DIY-friendly? |
|---|---|---|
| Compression | Hex nut threads onto valve body; brass ferrule visible when removed | Yes, with caveats |
| Sweat/solder | No nut; valve sits flush against pipe; silver ring of solder visible at joint | No — call a plumber |
| Push-to-connect | Collet ring (usually blue or gray plastic) at valve body; pipe pushes straight in | Yes, if pipe is sound |
SharkBite push-to-connect valves are compatible with PEX, copper, CPVC, PE-RT, and HDPE pipe, so the pipe material matters before you choose that route.
If you see a silver bead of solder where the valve meets the pipe, stop reading the DIY steps and skip to the "When to call a plumber" section.
Compression shutoff valve removal steps
Compression valves are the most common toilet shutoff in US homes built before the mid-2010s. A brass or chrome nut threads onto the valve body and compresses a small ring (the ferrule) against the pipe to create the seal.
- Place the bucket under the valve.
- Hold the valve body steady with one hand (or grip it with slip-joint pliers wrapped in a rag to avoid marring the finish).
- Turn the compression nut counterclockwise with your adjustable wrench. With firm, controlled pressure, it should usually break loose without drama.
- Once the nut is off, slide the valve away from the pipe. The old ferrule may stay on the pipe or come off with the valve — either is fine.
- Inspect the stub-out: it should be clean, round, and free of corrosion or pitting.
Watch Out: If the compression nut won't budge after firm, steady pressure — stop. Do not use a pipe wrench, extension bar, or excessive force. A stuck or stripped compression nut is a red flag that the fitting has corroded or galled to the threads. Forcing it risks cracking the pipe, stripping the valve body, or snapping the stub-out. At that point, a plumber who can cut the pipe back and install a new fitting is the safer call, and typically the less expensive outcome compared to water damage repair. Expect a plumber visit in the $277–$333 range per Homewyse's May 2026 national average — money well spent to protect your subfloor and the cabinet below.
Sweat solder shutoff valve removal steps
If your valve is soldered directly to the copper pipe, the removal process involves heat — a propane torch, flux, and solder — and the risks that come with open flame near finished walls, insulation, and the underside of a wooden vanity cabinet.
When to Call a Pro: Any sweat/solder valve is a clear hand-off to a licensed plumber. The removal requires desoldering the joint with a torch (or cutting the pipe), preparing the pipe end to the correct condition, and either re-soldering a new valve or switching to a push-to-connect replacement if the pipe stub is long enough and in good condition. Even if you're comfortable with a torch, a bathroom is a confined space with limited ventilation and combustible framing behind the wall. A licensed plumber carries the right tools and insurance for exactly this scenario. A SharkBite push-to-connect valve is sometimes the solution a plumber will use to avoid resoldering entirely — but the pipe prep and pipe-length requirements still need professional eyes first.
Push-to-connect valve removal steps
Push-to-connect valves — SharkBite being the dominant brand — have a collet (a plastic ring with small teeth) that grips the pipe when pushed in. Releasing the valve requires a disconnect clip or the SharkBite disconnect tongs.
- Slide a SharkBite disconnect clip (sold separately, around $2–$5 at most home centers) or the branded disconnect tongs into the gap between the collet ring and the valve body.
- Press the clip inward to depress the collet teeth, then pull the valve straight off the pipe.
- Inspect the stub-out immediately. The pipe must be clean, round, smooth, and free of scratches or corrosion. SharkBite's installation guidance is unambiguous: "Cut the pipe as cleanly and squarely as possible. Ensure the pipe is free of scratches and debris."
If the stub-out has corrosion pitting, dents, or scratches from the old collet teeth, the new push-to-connect valve will not seal reliably. You can try trimming back the pipe a half-inch with a pipe cutter to expose fresh material — but if the corrosion runs deeper than that, the job needs a plumber.
How to install the new toilet shutoff valve
With the old valve off and the stub-out inspected and clean, installation is the straightforward half of this job. The sequence is nearly identical regardless of valve type — compression or push-to-connect — though the hand motions differ.
Set the new valve orientation before tightening
Before threading or pressing anything, hold the new valve in position against the stub-out and rotate it so the outlet port (the side where the supply line connects) points toward the toilet tank, not straight up, not sideways, not angled in a way that will stress or kink the supply line. On most toilet rough-ins, the outlet should angle slightly upward and toward the tank.
[Image: Valve orientation on stub-out — outlet angled toward toilet fill valve, not perpendicular to wall]
Getting the orientation right before you tighten matters because: - Compression fittings, once torqued down, are difficult to rotate without breaking the seal - A supply line under tension from a misaligned outlet will vibrate, work loose over time, or kink
Set it, hold it, then tighten.
Tighten compression fittings without crushing the pipe
Slide the compression nut onto the pipe first (threads facing out), then the new brass ferrule, then seat the valve body against the ferrule. Thread the nut onto the valve body by hand until snug.
For the final tightening:
- Hold the valve body steady with one hand or a rag-wrapped pair of pliers — the valve body should not rotate as you tighten.
- Turn the compression nut clockwise with your adjustable wrench — hand-tight plus roughly a 3/4 to 1 full turn with the wrench. On a SharkBite 1/2-in compression x 1/4-in OD compression quarter-turn valve, follow the torque guidance on the package insert if included.
- Stop when you feel firm resistance. The ferrule compresses against the pipe and creates the seal at that point — additional turns don't add more sealing, they add stress and risk deforming the ferrule or crushing the pipe wall.
Watch Out: Over-tightening a compression fitting is one of the most common DIY mistakes on this repair. A crushed ferrule or deformed copper pipe won't seal reliably and typically leaks at the nut even after retightening. If you've gone past snug and feel the nut grinding rather than seating, you've likely already damaged something — add that to the plumber call list.
Seal and reconnect a push-to-connect or sweat replacement
Push-to-connect: Confirm the stub-out is clean and square-cut, then push the new SharkBite valve straight onto the pipe until you feel it click and seat. Give it a firm tug to confirm it won't pull free. That's the cleaner DIY path — no ferrule, no nut, and no open flame at the wall connection. SharkBite valves are compatible with 1/2-inch copper, PEX, CPVC, PE-RT, and HDPE pipe, so confirm your pipe material matches before purchase.
Sweat replacement: As noted above, a soldered replacement is plumber-only territory. If a plumber is converting a sweat connection to push-to-connect (a common modernization), they'll cut the pipe, deburr it, and confirm adequate insertion depth before pushing the new valve on. The SharkBite installation guidance specifies that the pipe must meet exacting cleanliness standards — which is harder to guarantee on older copper that has been soldered multiple times.
Should you replace the supply line at the same time?
Replace the supply line if it is old, kinked, corroded, or otherwise questionable; if it is fairly new, straight, and still in good shape, reusing it is acceptable after a close inspection.
Decision table:
| Supply line condition | Action |
|---|---|
| Less than 5 years old, braided stainless, no kinks | You can reuse it — inspect threads carefully |
| Plastic mesh or chrome-plated braided (older style) | Replace now |
| Kinked or bent at the connection end | Replace now |
| Any surface rust, corrosion, or bubbling | Replace now |
| Unknown age | Replace now |
The part to buy: a 12-inch (standard toilet height) braided stainless steel supply line with a 3/8-inch compression inlet and a 7/8-inch ballcock outlet. Measure your existing line if the toilet is mounted unusually low or high. Lowe's supply line category lets you filter by inlet fitting type — compression, push, or pipe thread — so you match the connection to your new shutoff valve outlet.
Thread the supply line onto the new valve outlet (hand-tight plus 1/2 turn with pliers, no Teflon tape needed on the compression end), then thread the other end onto the toilet fill valve tailpiece. Don't overtighten the plastic fill valve nut — hand-tight plus 1/4 turn is enough, and overtightening cracks the plastic.
How to test for leaks after reassembly
Restore water slowly. If you shut off at the main, open it halfway first to let pressure build gradually, then fully.
Leak-test checklist: 1. Valve body — run your finger around the full circumference where the valve threads or sits against the pipe; look for any drip or wet sheen 2. Compression nut — check where the nut meets the valve body; this is the most common leak point on a new installation 3. Supply line inlet — check the threaded connection at the shutoff valve outlet 4. Supply line outlet — check the connection at the toilet fill valve tailpiece 5. Fill cycle — let the tank fill completely; watch for water running down the outside of the supply line or pooling at the base of the valve
Dry everything with a towel before you start watching, so you're looking for new moisture, not residual water from the installation.
Per EPA WaterSense verification guidance, turn off the shutoff valve after filling the tank and wait 5 to 10 minutes; if the pressure drops or the fill valve cycles on, either the shutoff valve or the fill valve has a leak.
What to do if the valve drips after tightening
A small drip at the compression nut after the first restore is common — the ferrule sometimes needs the pressure load to fully seat. Turn the nut an additional 1/8 to 1/4 turn with the water on and the valve open. Watch for 5 minutes.
If the drip continues after that careful retighten-and-inspect cycle, stop. Do not keep cranking. Continued leakage at a compression fitting that's already torqued past hand-tight usually means one of three things: the ferrule is damaged, the pipe isn't round, or there's a thread problem at the valve body. All three require either a new valve attempt (if the pipe is still sound) or a plumber call. The ceiling on this repair is putting a bucket under the valve and calling a professional the same day — water on a bathroom floor gets into the subfloor fast.
When to Call a Pro: Stop the repair and call a licensed plumber if the valve drips after a second careful retighten, if any fitting is wet immediately upon restoring pressure, or if you can't identify the leak source within two minutes of close inspection.
When to call a plumber for a toilet shutoff valve
Most toilet shutoff valves are straightforward homeowner repairs. But a handful of conditions flip this from a DIY job to a plumber call, and recognizing them before you're mid-repair is the difference between a $25 fix and a $500 water damage claim.
When to Call a Pro: Contact a licensed plumber if you encounter any of the following: - Seized or stripped compression nut — won't turn with firm, steady wrench pressure, or the flats have rounded off - Sweat/solder connection — any valve soldered to the pipe; open flame in a finished bathroom is not a DIY task - Corroded or pitted stub-out — the pipe coming out of the wall shows green corrosion, pitting, soft spots, or won't hold a clean, round profile - Main shutoff failure — the house main won't fully close, meaning you cannot safely isolate the work area - Leaking after reassembly — dripping continues after one careful retighten-and-inspect cycle - Pipe too short for push-to-connect — the stub-out doesn't have enough length for minimum insertion depth after trimming back damaged material
Homewyse's May 2026 national average for a plumber-installed shutoff valve starts at $277–$333. That's not cheap, but compare it to the cost of a wet subfloor, mold remediation, or a cracked main shutoff replaced on an emergency basis — the calculus shifts quickly.
Signs the valve or stub-out is too damaged for DIY
Look at the stub-out (the short pipe section protruding from the wall) before you commit to any installation method. Here's what takes it out of DIY territory:
- Green or white corrosion visible on the copper or brass surface — minor surface oxidation is fine; powdery green deposits or white crusty buildup around a fitting indicate active corrosion and potential pipe thinning
- Pitting — small craters or rough texture on the pipe surface; a push-to-connect valve requires a smooth, unmarked pipe exterior to seal, per SharkBite's installation guidance
- Soft or deformed copper — if the pipe walls feel thin or flex when you grip lightly, the copper has thinned from corrosion or past overtightening
- Stub-out too short — if trimming back the damaged section would leave less than the minimum insertion depth for a push-to-connect fitting, a plumber needs to extend the pipe before any valve can be seated
Any one of these conditions means the stub-out will not reliably accept a new fitting of any type without professional pipe work first.
What a plumber typically handles that DIY cannot
When the valve problem connects to pipe condition, the repair scope expands past what a homeowner can complete with hand tools. A plumber brings a pipe cutter, a soldering kit, push-to-connect fittings in multiple sizes, and the diagnostic experience to recognize when the failure is really about the pipe and not the valve.
Specific scenarios where a plumbing service is the right call: rerouting or extending a too-short stub-out; desoldering an old sweat valve and sweating a new connection or converting to push-to-connect with proper pipe prep; addressing a main shutoff that's also failing (common in older homes where the street-side shutoff and the house shutoff are both original equipment); and any situation where water cannot be fully isolated long enough to complete the repair safely.
Common mistakes when replacing a toilet shutoff valve
Skipping the tank drain-down. Disconnecting the supply line with a full tank means roughly a gallon of water drains onto your floor the moment the line comes loose. Flush, sponge, then disconnect — always.
Reusing a damaged supply line. A corroded or kinked supply line that has been under pressure for years is a leak waiting to happen, especially at the connection ends where the metal fitting meets the braided jacket. With the valve out and the water off, a new braided stainless steel supply line takes three minutes to install. There is no good reason to skip this.
Over-tightening compression fittings. Plumber's logic: a ferrule seals at snug, not at torqued. Past a certain point, more turns crush the ferrule and create the leak instead of preventing it. Hand-tight plus 3/4 to 1 full turn is the ceiling for most residential 3/8-inch compression fittings.
Forcing corroded hardware. If a compression nut doesn't break loose with firm, controlled wrench pressure, reaching for a longer lever or a pipe wrench risks snapping the stub-out at the wall — a repair that now involves the wall, the framing, and a permit in most jurisdictions. The cost of a plumber visit is far lower than the cost of exploratory demolition.
Installing a push-to-connect valve on an unprepared stub-out. Pushing a SharkBite valve onto a scratched, dirty, or out-of-round pipe bypasses the collet seal and creates a connection that may hold pressure initially but fails under thermal cycling. Prep the pipe per SharkBite's guidance — clean, square, free of scratches — or don't use a push-to-connect fitting.
Ignoring the fill valve connection. The supply line upper end threads onto the fill valve tailpiece, which is usually plastic on modern toilets. Overtightening this connection cracks the tailpiece and creates a leak at the tank base that looks like a wax ring failure. Hand-tight plus 1/4 turn is enough.
Toilet shutoff valve replacement FAQ
How do you replace a toilet shutoff valve?
Shut off the water upstream of the valve (at the valve itself if it closes fully, or at the house main if it doesn't). Flush the toilet and sponge out remaining tank water. Place a bucket under the valve, disconnect the supply line, then remove the old valve by loosening the compression nut, releasing the push-to-connect collet, or calling a plumber for a sweat connection. Install the new valve — orienting the outlet toward the tank before tightening — then reconnect the supply line, restore water slowly, and check every fitting for leaks.
Can you replace a toilet shutoff valve without turning off the main water?
If the toilet's existing shutoff valve closes fully and the tank stops refilling after you close it, you can use it as your isolation point without shutting off the main. But if that valve is the one you're replacing and it won't close completely — or if it closes but still passes a trickle — you need to shut off at the house main before touching any fitting.
Should you replace the supply line when replacing a shutoff valve?
Yes, in almost every case. The supply line is a $10–$20 part, it's fully exposed while the valve is out, and an aged or corroded line is a common source of slow leaks after a valve replacement that went perfectly otherwise. Replace any line that shows kinking, surface rust, bubbling at the braided jacket, or unknown age. Match the inlet fitting type — most toilets use a 3/8-inch compression connection at the valve end.
How do you know if a shutoff valve needs to be replaced?
The clearest signs: the valve won't close fully (water still runs into the tank after you shut it), the handle is stiff or won't turn, there's visible corrosion or mineral buildup at the valve body, or there's an active drip at the compression nut even when the valve is open and not being disturbed. Multi-turn globe valves (the old oval-handle type) are worth proactively replacing with quarter-turn ball valves — they fail more often, they're slower to close in an emergency, and replacement parts are harder to find.
How much does it cost to have a plumber replace a toilet shutoff valve?
Per Homewyse's May 2026 national average data, professional shutoff valve installation starts at $277–$333 per valve. That range includes labor and a standard valve, but not pipe repair if the stub-out is corroded or needs extension. Emergency or after-hours service rates will push the number higher.
What type of replacement shutoff valve is easiest to install?
A push-to-connect quarter-turn ball valve — such as those in the SharkBite lineup — is the fastest to install when the stub-out is in good condition. No ferrule, no nut, no tools required at the pipe connection. The trade-off: the stub-out must be perfectly clean, smooth, and square-cut, and the pipe material must be compatible (copper, PEX, CPVC, PE-RT, or HDPE per SharkBite's specifications). On a marginal stub-out, a compression valve gives you more control over the seal.
Sources & References
- Bob Vila — Replace a Toilet Shut-Off Valve — baseline competitor guide used as reference for workflow structure
- SharkBite Push-to-Connect Valves — pipe material compatibility specifications
- SharkBite Installation Video Guidance — manufacturer pipe-prep and installation requirements
- Homewyse — Cost to Install a Water Shutoff Valve (May 2026) — national average cost data for professional valve installation
- EPA WaterSense — Pressure Hold Verification — shutoff integrity verification methodology
- Lowe's — Toilet & Faucet Supply Lines — supply line fitting type reference and compatibility filtering
- Lowe's — SharkBite 1/2-in Compression × Quarter-Turn Valve — product specifications for compression quarter-turn valve example
Keywords: compression fitting, sweat solder joint, push-to-connect fitting, quarter-turn ball valve, stub-out, ferrule, braided stainless steel supply line, shutoff valve stem, Teflon tape, adjustable wrench, basin wrench, WaterSense, 1/2-inch copper, 3/8-inch compression, SharkBite