At a Glance: - Time: 15–30 minutes per piece of furniture - Cost: $10–$30 per anchor kit - Skill level: Beginner — if you can drive a screw, you can do this - Tools: Stud finder, drill/driver, bit set, tape measure, level, screwdriver
A furniture tip-over is not a freak accident — it is a predictable, preventable event that kills and injures children every year in the United States. The good news is that a properly installed anti-tip anchor kit, fastened into a wall stud, takes about 15 minutes and costs under $30. This guide walks you through every step, from choosing the right hardware to testing that the dresser is genuinely secure.
Why dresser and bookcase tip-overs are a child safety emergency
Every tall dresser, bookcase, armoire, and wardrobe in a child's room needs to be anchored to the wall — full stop. This is not a precaution for unusually reckless toddlers. Children climb on open drawers the same way they climb stairs: because it's there and it works, right up until it doesn't.
The numbers from the U.S. Consumer Product Safety Commission are stark: CPSC staff estimates 234 fatalities from clothing storage unit tip-overs between January 2000 and April 2022 — 199 of those victims were children. Over the 15-year span from 2006 through 2021, tip-overs involving clothing storage units sent an estimated 84,100 people to the emergency room, averaging roughly 5,300 injuries per year. That's not a statistical abstraction; that's a child injured in an American home every single day.
The federal response is the STURDY Act (Stop Tip-overs of Unstable, Risky Dressers on Youth), which directed CPSC to adopt a mandatory safety standard. CPSC formalized ASTM F2057-23 as that standard, requiring that clothing storage units — including chests of drawers, armoires, chifferobes, bureaus, door chests, and dressers — pass stability tests that simulate a child pulling on open drawers or climbing on them. The standard applies to free-standing units at least 27 inches tall and at least 30 pounds. If the dresser in your nursery meets those dimensions (almost every adult dresser does), it falls within the scope of what STURDY was designed to address.
CPSC is direct about what parents should do right now: "CPSC recommends that consumers anchor furniture, including dressers, securely to the wall." The agency's Anchor It! campaign puts it plainly: "The best way to protect your children from falling furniture is to secure your furniture to the wall with anti-tipover devices like furniture and/or TV anchors."
STURDY's protections specifically target children up to 72 months old — that's a six-year window during which children are the most physically active and the most unpredictable. Any tall furniture in reach of a child that age should be anchored.
What you need before installing a furniture anchor kit
The best way to anchor furniture to a wall is to attach a steel cable, metal L-bracket, or nylon strap between the furniture's solid frame and a wall stud — then tighten it until there is zero play. Before you touch a drill, gather everything on this list so you are not hunting for hardware halfway through.
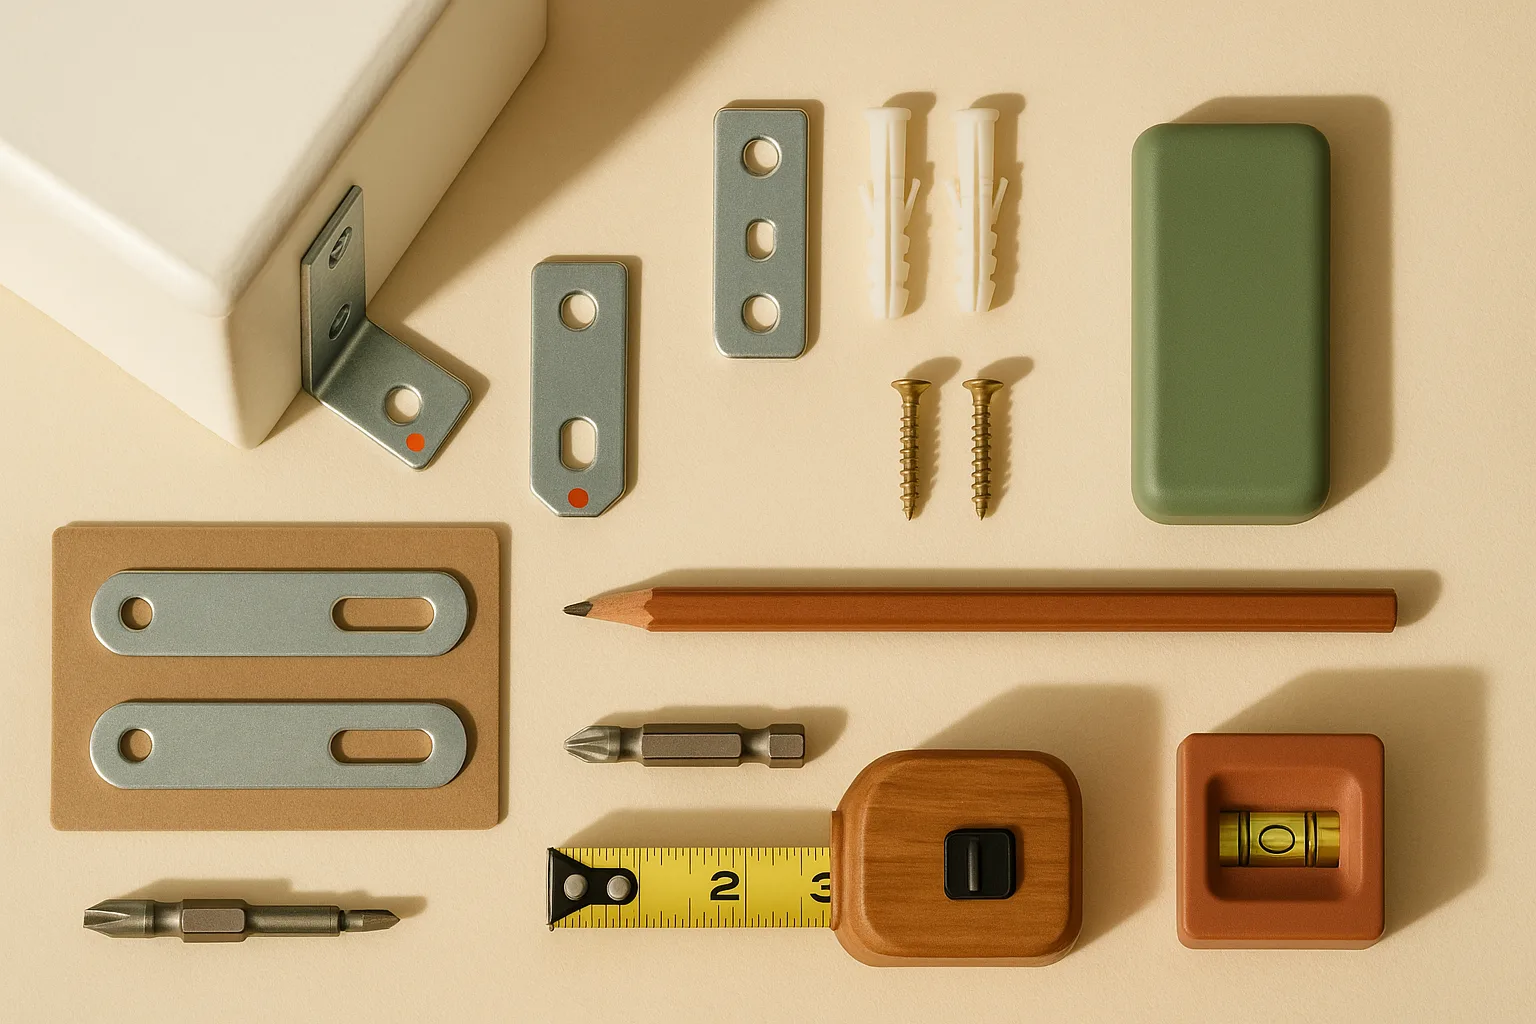
Tools: - Stud finder (magnetic models work on drywall; electronic models like the Franklin Sensors ProSensor 710+ work on lath-and-plaster) - Drill/driver (cordless is easiest — a DeWalt DCD771 or similar 20V compact is ideal) - Bit set (a #2 Phillips bit and a 3/32-inch pilot drill bit cover most kits) - Tape measure - Level (a small 4-inch torpedo level is enough) - Screwdriver (manual, for final tightening or where a drill won't fit) - Pencil for marking
Hardware — the furniture anti-tip kit itself: - For most drywall homes with wood studs: a metal L-bracket or steel cable furniture anti-tip kit rated for the furniture's weight - For plaster walls: a kit designed for that substrate, or toggle bolts if a stud is not accessible (see the next section) - One kit per piece of furniture — tall units over 60 inches may benefit from two anchor points
Consumer Reports notes that anti-tip kits come in several forms — steel cables, metal L-brackets, and nylon straps — and that the installation process can take only a few minutes when done correctly. Steel cable and metal L-bracket kits are generally more durable than nylon-strap versions for long-term use. Avoid kits that rely entirely on plastic zip ties as the restraining mechanism; more on that in the mistakes section.
Pro Tip: Buy one extra kit when you're at the hardware store. Finding a second stud location is common once you get behind the dresser, and having a spare means you finish the job in one trip.
How to choose the right anti-tip hardware for drywall, plaster, or rental homes
Wall type is the single biggest variable in hardware selection. Consumer Reports tested 14 wall anchor kits and found that buyers need to match the kit to the wall material — what holds securely in standard drywall over wood studs may not work in a 1920s plaster home or a steel-stud apartment.
| Wall Type | Best Anchor Approach | Notes |
|---|---|---|
| Drywall over wood stud | Metal L-bracket or steel cable screwed into stud | Strongest option; always the first choice |
| Drywall — no stud accessible | Toggle bolt (Toggler SNAPTOGGLE) into drywall cavity | Use only if stud mounting is impossible; check weight rating |
| Plaster over wood lath | Electronic stud finder, pilot hole into stud, lag screw | Plaster is brittle; go slow, predrill carefully |
| Steel studs (many apartments) | Self-drilling metal stud screws or toggle bolt | Standard wood screws do not grip steel studs |
Stud mounting vs. drywall-only solutions
Into a wood stud is always the right answer when you can get there. A properly driven screw into a sound wood stud provides far more holding power than a drywall-only anchor, which is why stud-mounted hardware is the preferred option in safety guidance. If your dresser sits against an exterior wall, a stud is almost certainly within 16 to 24 inches of wherever the dresser falls, so it is usually worth repositioning the furniture a few inches to align with one.
Drywall-only options are a legitimate backup for rentals or for rooms where furniture placement is constrained by windows or closets. Choose a high-quality toggle rated for at least twice the expected load, and check the wall-side anchor quarterly.
One important note from the Home Depot product listing: do not attach anti-tip hardware to plywood. Some furniture backs are thin plywood or MDF veneer — the anchor needs to bite into solid frame members, not a ¼-inch back panel that could pull free.
DIY vs Pro: Most drywall installations with wood studs are genuinely DIY-friendly. The job becomes more complicated — and sometimes worth a professional — when your walls crack or crumble during drilling, when you cannot get a secure stud mount, or when the piece needs blocking or a more advanced fastening method beyond a basic bracket.
How to find wall studs behind a nursery dresser or bookcase
You can install furniture anchors without a stud — but you shouldn't, if there is any way to avoid it. A stud-mounted anchor is preferred and more secure than any drywall-only option, and it is the standard most safety guidance points parents toward. Use a non-stud option only when the wall framing truly makes a stud inaccessible.
Step-by-step stud-finding sequence:
- Pull the dresser away from the wall by at least 12 inches so you can work freely. Enlist a second adult for any piece over 80 pounds.
- Start from a known reference point. Electrical outlets are attached to the side of a stud, so start your scan there.
- Run the stud finder horizontally across the wall at the height where the anchor will land (typically 3–6 inches below the top of the dresser, on the wall). Move slowly — about 1 inch per second — and mark both the leading and trailing edge of each stud signal with a pencil. The stud centerline is the midpoint of those two marks.
- Verify with a second pass. Run the stud finder again 2 inches above your first pass line to confirm. Two consistent readings mean you have found a real stud, not a pipe or wire.
- Confirm with a finish nail. If your stud finder reads confidently, skip this. If you are unsure, drive a 1½-inch finish nail into the wall at your marked center. Solid resistance after the first ½ inch means stud. Hollow or soft means you missed — adjust 2 inches and try again. Fill the nail hole with a dab of spackling before you leave.
- Mark the stud center clearly with a pencil X at anchor height. This is the target for your wall-side screw.
Watch Out: Stud finders can misread near door frames, window frames, and corners — there is often blocking or doubled framing that creates false positives. If the reading seems unusually wide, treat it as a frame member and confirm with a nail before drilling your pilot hole.
Step 1: Mark the anchor points on the furniture frame and wall
With the stud located, position the dresser or bookcase where it will live permanently. Confirming final placement before drilling matters — moving the furniture after the wall anchor is installed means patching and re-drilling.
- Slide the dresser back into position against the wall.
- Identify the anchor attachment point on the furniture. This should be a solid frame member at the top of the unit — the top rail, a solid side panel, or a reinforced back frame. Avoid the thin ¼-inch back panel. Many kits include a bracket that sits on top of the dresser with a second piece on the wall.
- Hold the furniture-side bracket against the frame and mark the screw holes with a pencil.
- Use a level to confirm the bracket is sitting plumb (straight) before you mark. A crooked bracket creates lateral stress on the anchor connection.
- Transfer the wall mark. With the furniture bracket marked, use your tape measure to find the corresponding wall height. Hold the wall-side bracket against your stud mark at that height, confirm it is level, and mark the screw hole location with a pencil.
- Double-check alignment by holding both brackets together in position (one on the furniture frame, one on the wall) with the connecting cable or strap between them. The strap should be nearly taut with the dresser sitting flush to the wall — not angled up or down more than about 10 degrees.
Pro Tip: If the kit includes a connector cable or strap, give yourself about 1 inch of slack after tightening. A completely rigid zero-slack connection can place torque stress on the anchor points when the dresser settles or is nudged.
Step 2: Drill pilot holes and attach the anchor to the dresser
Pilot holes prevent wood from splitting and make driving the screw straight far easier, especially on the furniture's back frame where hardwood and MDF both resist a cold screw.
- Select the correct bit. For most kits using #8 or #10 wood screws, a 3/32-inch or 7/64-inch pilot bit is appropriate. If the kit specifies a bit size, use exactly that.
- Drill the furniture-side pilot hole at your marked location on the solid frame. Go straight in — a pilot hole drilled at an angle will cause the screw to travel off course.
- Drive the furniture-side screw using your drill/driver on a medium torque setting, or use a manual screwdriver for the final turns. Snug and firm is the goal; you should not be able to wiggle the bracket by hand once installed.
- Avoid these spots on the furniture:
- Thin decorative trim or molding on the back or top edge
- The thin ¼-inch plywood or hardboard back panel — confirmed by the Home Depot product guidance: "Do not attach to plywood"
- Particle board edges (use the face of a solid frame rail instead)
-
Any area less than ¾ inch from the edge of a board, which risks splitting
-
Attach the connecting cable, strap, or L-bracket link to the furniture-side hardware but leave the wall-side end loose until the next step.
Watch Out: Overtightening on the furniture side can strip the screw hole in MDF or particleboard before you ever get to the wall side. If you feel the screw spinning without resistance, remove it, apply a small amount of wood glue, insert a toothpick into the hole, let it dry, and re-drive. This fixes a stripped hole in soft furniture substrate in about 20 minutes.
Step 3: Secure the wall side into a stud and tighten the connection
The wall-side connection carries the actual load when a child pulls on a drawer or climbs the furniture — so this step is where accuracy matters most.
- Drill a pilot hole into the stud at your marked location. Use the bit size specified by the anchor kit instructions for the wall material, and go straight in to the depth the hardware requires. For steel studs, use a dedicated self-drilling metal screw or a drill-and-toggle approach instead.
- Position the wall-side bracket over the pilot hole and confirm it is level. A slight tilt here will cause the anchor cable or strap to pull at an angle, reducing effective holding power.
- Drive the wall-side screw. Most kits recommend a screw at least 2½ inches long so it penetrates the drywall (typically ½ inch) and bites 1½ to 2 inches into the stud. Longer is generally better here.
- Connect the cable or strap between the furniture bracket and wall bracket. Pull out most of the slack. The dresser should remain flush against the wall — the anchor is not meant to hold the dresser away from the wall, just to prevent forward tipping.
- Tighten the final connection — the turnbuckle, clip, or strap adjuster included in your kit. Snug is correct; overtightening a strap so it bites into the furniture top or wall bracket can fatigue the material over time.
- Verify stud material. If you suspect steel studs (common in apartments built after the 1990s, and nearly universal in commercial-to-residential conversions), probe your pilot hole with a finish nail before installing. Resistance that feels different from wood — a scraping, metallic quality — confirms steel. Use self-drilling #10 × 1¼-inch sheet metal screws or switch to a high-quality toggle bolt.
Pro Tip: Consumer Reports recommends selecting anchor kits based on your specific wall type. If you are unsure whether your pilot hole landed in the stud, do a simple test: remove the screw and slide a stiff wire into the hole at an angle. If it hits something solid within 1 inch, you are in the stud.
How to test that the dresser or bookcase is actually stable
As Consumer Reports notes, "The process takes just a few minutes — and could save a life." Testing is part of those minutes — do not skip it.
Stability check sequence:
- Open all drawers at once (or as many as the piece has). Under ASTM F2057-23, a properly stable unit must not tip over or be supported only by an open drawer. If opening multiple drawers makes the unit visibly strain against the anchor, the anchor is doing its job — but also check whether the furniture itself is overloaded with heavy items in the top drawers.
- Apply firm forward pressure to the top of the unit with both hands. Push toward the wall — the unit should feel steady. Then push away from the wall. The anchor strap or cable should immediately take tension and prevent a forward tip.
- Check for wall movement. Look at the wall bracket while someone applies pressure to the dresser. The drywall should not flex or creak around the bracket. If it does, the screw may not be in the stud — remove and recheck.
- Verify the furniture-side bracket. Pull on the furniture bracket directly. It should not wobble or rotate. If it moves, the furniture-side screw needs to be re-driven into more solid material.
- Pass/fail: The unit passes if it cannot be tipped forward by steady adult hand pressure, all drawers can be opened simultaneously without the unit tipping, and neither the wall bracket nor the furniture bracket shows any play or deflection.
Watch Out: Consumer Reports has reported that plastic zip tie-style anti-tip restraints can become brittle and break over time, creating a tip-over risk even in furniture that was previously anchored. If your current anchors use plastic-only restraints (no metal cable, bracket, or strap), replace them with metal hardware. This applies especially to kits installed more than two to three years ago.
Common furniture anchor mistakes that make tip-over protection fail
Installing the hardware is the easy part. These mistakes make an installed anchor useless:
- Anchoring into drywall alone when a stud was reachable. A screw in bare drywall can pull through the paper facing under load. Always use the stud when it's within 24 inches horizontally of where the furniture sits.
- Using plastic zip tie restraints as the primary connection. Consumer Reports documented recalls of plastic anti-tip kits because the zip tie component becomes brittle over time and can snap. Use steel cable, metal bracket, or reinforced nylon with metal hardware at connection points.
- Attaching to the thin plywood or hardboard back panel. The back panel of most dressers is decorative and structural only for the box itself — it is not designed to withstand tip-over forces. Attach to the solid frame.
- Installing only one anchor on a tall or wide unit. Any unit taller than 60 inches or wider than 48 inches benefits from two anchor points. One anchor centered on a wide bookcase allows the unit to pivot sideways if hit from an angle.
- Leaving drawers heavily loaded at the top. ASTM F2057-23's stability testing simulates loaded drawers and open drawers simultaneously for exactly this reason. A dresser with a full top drawer of jeans and an empty bottom drawer has its center of gravity shifted toward the front — it tips more easily. Store heavier items in lower drawers.
- Skipping the anchoring because the furniture is "against the wall." Wall contact alone provides no meaningful tip-over protection. A child pulling on an open drawer can generate enough forward momentum to pull the unit away from the wall and over.
- Forgetting any piece that meets the size threshold. ASTM F2057-23 covers free-standing clothing storage units 27 inches tall and 30 pounds or heavier. That includes the small chest you moved into the toddler's room last month, the wardrobe in the guest room that doubles as the nursery, and the bookcase in the playroom.
When to hire a handyman for nursery furniture anchoring
Most parents can handle this installation confidently. The job is straightforward when walls are standard half-inch drywall over 16-inch on-center wood studs — which describes the majority of American single-family homes built after 1950.
When to Call a Pro: Hire a local handyman service rather than DIY when you need a more advanced fastening method than a basic bracket or when you want help coordinating wall penetrations with building management.
A handyman visit for furniture anchoring can be worth the hire if you want a second set of hands across multiple pieces, or if the installer needs to evaluate hidden wall conditions before drilling.
Furniture anchor shopping checklist for nurseries and kids' rooms
Before you head to the hardware store or place an online order, run through this checklist to avoid buying the wrong kit:
Know your wall: - [ ] Standard drywall over wood studs → metal L-bracket or steel cable kit, 2½-inch screws - [ ] Plaster over lath → electronic stud finder required, lag screws, or professional install - [ ] Drywall over steel studs → self-drilling metal stud screws or high-load toggle bolt
Know your furniture: - [ ] Identify solid frame attachment points on each piece (top rail, side panel, back frame) - [ ] Confirm no plywood or thin back panel at your intended anchor location - [ ] Note height and weight — units over 60 inches tall or 100+ pounds warrant two anchor points
Kit requirements: - [ ] Metal restraint (cable, strap with metal hardware, or L-bracket) — not plastic-only - [ ] Weight rating at or above the furniture weight - [ ] Screws long enough to reach into the stud (typically 2½ inches minimum for ½-inch drywall) - [ ] One kit per piece of furniture, two kits for very tall or heavy units
Home safety products to buy now: - [ ] Furniture anchors for dressers, bookcases, armoires, and wardrobes - [ ] TV anchors for any television on a stand or mounted above low furniture - [ ] A second kit if you are anchoring more than one tall piece in the room
CPSC's Anchor It! campaign identifies both furniture anchors and TV anchors as the essential home safety products for protecting children from falling furniture. Consumer Reports' testing of 14 anchor kits confirms that the right kit depends on wall type — a cheap one-size kit from the dollar section is not equivalent to a rated steel cable kit designed for the purpose.
[Image: Shopping checklist comparison — L-bracket, cable, and nylon strap kit types side by side]
Frequently asked questions about anchoring nursery furniture
How do you anchor a dresser to the wall?
Find a wall stud behind the dresser using a stud finder. Attach the furniture-side bracket to a solid frame member on the dresser's back or top rail using a predrilled pilot hole and the screws included in your anti-tip kit. Then drive the wall-side bracket into the stud with a screw sized for the kit and wall material. Connect the cable, strap, or bracket between the two pieces and tighten until there is minimal slack. Test by pushing forward on the top of the dresser — it should not tip.
What is the best way to anchor furniture to a wall?
The best method is a metal bracket or steel cable kit fastened from the furniture's solid frame directly into a wall stud. CPSC's Anchor It! campaign cites this approach as the most effective protection against furniture tip-overs for children. Stud mounting dramatically outperforms any drywall-only solution. If you cannot reach a stud, use a high-quality toggle bolt rated for the furniture weight — but treat it as a backup, not a first choice.
Can you install furniture anchors without studs?
Yes, but with caveats. Toggle bolts (like the Toggler SNAPTOGGLE) and heavy-duty drywall anchors can hold meaningful loads in standard ½-inch drywall when properly installed. The critical requirement is matching the anchor to the wall thickness and using one rated for the expected load. A plastic expansion anchor is not sufficient. That said, even a well-installed toggle provides less holding power than a stud-mounted screw — reposition the furniture to reach a stud whenever possible.
Do all dressers need to be anchored?
ASTM F2057-23 — the mandatory safety standard adopted by CPSC under the STURDY Act — covers free-standing clothing storage units at least 27 inches tall and at least 30 pounds. That description fits nearly every adult dresser and most kids' dressers. CPSC extends its recommendation to all tall furniture in a child's room, including bookcases, armoires, and wardrobes. If the piece is in a room where a child under 6 years old has access, anchor it.
What happens if a dresser is not anchored?
An unanchored dresser can tip forward when a child opens multiple drawers and uses them as steps — which children do instinctively. The top-heavy unit falls forward with the full force of its weight (often 80–150 pounds for an adult dresser) onto the child beneath it. CPSC data shows this scenario has caused 199 child fatalities and tens of thousands of injuries between 2000 and 2022. Anchoring takes under 30 minutes and eliminates that specific risk.
What to do after you anchor the dresser and bookcase
Anchoring once is not a set-it-and-forget-it task. Furniture moves, hardware loosens over time, and life circumstances change.
After installation, set these reminders:
- Inspect anchors every six months. Grab the top of each anchored piece and push firmly toward the wall, then pull away. Any new wobble or rattle means a screw has worked loose. Re-tighten or replace.
- Check plastic components every year. Consumer Reports warns that plastic zip tie restraints become brittle and can snap, even in furniture that has been anchored for a while. If any component of your anchor kit is plastic and showing discoloration, cracking, or brittleness, replace the entire restraint with a metal cable or bracket kit.
- Re-anchor after every move. Even a repositioning within the same room counts. The wall-side screw has to go into the stud at the new location — do not assume the old hole is still usable if the furniture moved even six inches.
- Add anchors whenever you add furniture. A new bookcase for a growing reader, a second dresser for a shared room, a taller wardrobe for a big-kid room redesign — each new tall piece needs its own furniture anchor before the child has access to it.
- Reassess as the child grows. The STURDY Act targets children up to 72 months, but older children can also be injured. Keep anchors in place through elementary school years, especially for tall bookcases and wardrobes.
The math on this one is easy: a short installation now prevents a life-changing tip-over later.
Sources & References
- CPSC Final Rule: Tip-overs of Dressers and Other Clothing Storage Units — Primary CPSC announcement on STURDY Act mandatory standard, fatality and injury statistics
- CPSC Anchor It! Campaign Video — CPSC guidance on using anti-tip devices for furniture and TVs
- CPSC STURDY Act FAQ — CPSC FAQ on the STURDY Act scope and requirements
- ASTM F2057-23 Standard — Full text of the ASTM stability testing standard for clothing storage units
- ASTM News: Clothing Storage Units Standard — ASTM summary of F2057-23 scope and applicability
- Consumer Reports: How to Anchor Furniture — Installation guidance and wall-type testing
- Consumer Reports: Best Furniture Anchor Kits — Testing of 14 anti-tip kits by wall type
- Consumer Reports: Plastic Anchor Kit Recalls — Documentation of plastic zip tie anchor failures and recall guidance
- Home Depot Furniture Anti-Tip Kit (SKU 9976524) — Product specifications and installation constraints including plywood warning
Keywords: CPSC, STURDY Act, ASTM F2057-23, Anchor It! campaign, wall studs, drywall anchors, furniture anti-tip kit, stud finder, drill/driver, torque screwdriver, level, dresser, bookcase, armoire, wardrobe, JPMA