Pet door installation runs $150 to $800 or more for most U.S. homeowners, but that single number hides a wide spread depending on where the door goes. A basic cutout in an interior wood door is one of the simpler handyman jobs on the list. A wall installation that requires cutting through drywall, insulation, and siding is a different project entirely. And a sliding glass or patio door install is usually a panel swap — not a glass-cutting job — which changes who you need to hire and what it costs. This guide breaks it down by install type so you can budget accurately and hire the right person the first time.
How much does pet door installation cost in the U.S.?
Total cost depends almost entirely on where the pet door goes and what features the unit includes. According to HomeGuide's dog door installation cost guide, dog door installation runs $200 to $800 or more for materials and labor combined. Cat door installs tend to run a little lower — HomeGuide's cat door page puts that range at $150 to $500 — mostly because smaller flap sizes mean a shorter cutting job and a less expensive unit.
Labor alone, per HomeGuide's door installation page, runs $30 to $80 per hour plus any call-out fees, whether you hire a handyman service or a licensed contractor. That hourly spread matters: a straightforward door cutout might take one to two hours, while a wall install can stretch to half a day or more once framing, sealing, and cleanup are factored in.
Cost Snapshot: Existing door install: $150–$400 total | Wall install: $300–$800+ | Sliding glass/patio panel: $200–$600+
The pet door unit itself — the PetSafe Freedom Patio Panel or a wall-entry door insert, for example — typically represents $75 to $300 of that total, so labor and materials are roughly split on mid-tier jobs. If a quote looks suspiciously low, it probably excludes materials or finish work; more on that below.
Pet door installation cost by install type: existing door, wall, and sliding glass
The competitive gap in most pet door cost articles is that they blend all three install types into a single range. They are not the same job. Here is how labor, materials, and total cost break down across each type.
| Install Type | Typical Labor | Typical Materials | Estimated Total |
|---|---|---|---|
| Existing wood/hollow-core door | $50–$150 | $75–$200 | $150–$400 |
| Exterior wall (framing required) | $150–$400 | $100–$300 | $300–$800+ |
| Sliding glass/patio panel insert | $75–$200 | $100–$300 | $200–$600+ |
These ranges reflect a U.S. handyman service at $30–$80/hour and standard mid-range pet door units. Premium electronic units, large-breed flaps, or insulated wall tunnels push the top end higher. HomeGuide's general door installation page notes that door installation averages $750 and ranges from $340 to $1,500 when framing or structural work is involved — a ceiling that becomes relevant anytime you are cutting into an exterior wall.
Watch Out: A sliding-glass patio-panel install typically involves replacing a section of the track with a prefabricated panel — not cutting through the glass itself. That distinction matters for who you hire and what the job costs.
Existing wood or hollow-core door costs and labor complexity
A handyman service can handle this job confidently. The process is a template-guided cutout: trace the frame, cut the opening with a jigsaw, snap in the pet door frame, and secure with the provided hardware. A competent handyman can complete the work in one to two hours on most standard interior or hollow-core exterior doors.
LaborComplexity Note: Cutting and fitting the pet door frame are included in almost every handyman quote for this job. Patching and paint are not. If the cutout requires cleaning up rough edges, touching up door paint, or adding interior trim, confirm those line items are in the quote before work starts. HomeGuide specifically separates total project cost from labor-only pricing for good reason — a $60 labor quote can balloon to $200 once materials and touch-up work are added.
PetSafe's wall-entry pet door page notes that installation "requires some tools and careful measuring" and includes a cutting template and installation guide — a reminder that even a "simple" cutout needs precision. Measure the pet door frame twice before cutting; a misaligned opening on a hollow-core door cannot be patched invisibly.
One practical constraint: confirm the door can be cut at all. Some fiberglass exterior doors and steel-core doors cannot accept a standard pet door cutout without voiding the manufacturer's warranty or compromising the door's weather seal. Hollow-core and solid-wood interior doors are the most forgiving.
Wall install costs, framing needs, and weather sealing
Wall installations cost more because they are a multi-trade job compressed into a single visit. The sequence, as Pet Door Products' wall-install guide describes it: "Cut the Opening: Carefully cut through drywall and insulation using appropriate tools. Install the Frame: Secure the pet door frame into the wall opening. Seal and Insulate: Apply caulking and insulation for maximum energy efficiency."
That three-step description understates the actual scope. Cutting through an exterior wall means penetrating drywall on the inside, the insulation layer (batt or rigid board), the sheathing, and the exterior cladding — which could be wood siding, HardiePlank fiber-cement siding, stucco, or brick. Each material demands different tools and technique.
FramingAndWeatherproofing Checklist — what a wall install scope must include: - Cutting through all wall layers (drywall, insulation, sheathing, exterior cladding) - Framing the rough opening with a header if near a load-bearing wall - Installing the pet door tunnel extension if wall thickness exceeds the door's range - Applying flashing tape at the exterior opening to block moisture - Adding exterior trim to cover raw edges - Sealing all gaps with silicone sealant (PetSafe's installation kit provides clear silicone sealant and extra weatherstripping for "more weather resistance") - Patching interior drywall or casing around the frame - Insulating the tunnel if it is not pre-insulated
PetSafe's Wall Entry Pet Door fits walls measuring 4¾ to 7¼ inches thick. If your wall is thicker — common in older homes with double-framing or in homes with added exterior insulation — you need the optional extension tunnel. Miss that detail and the frame will not close properly, leaving a gap that drafts, leaks, and welcomes insects.
HomeGuide's door installation page confirms that exterior work "can require additional framing, flashing, and load-bearing headers, which increase installation costs." That framing line is the one that can turn a $300 job into a $700+ job if the wall location happens to fall near a structural element.
Sliding glass or patio door pet door costs and tempered-glass constraints
GlassInstallCallout: You do not cut through tempered glass to install a pet door. The verified installation method for sliding glass and patio doors is a replacement panel insert that slides into the existing door track — no drilling, no cutting into the glass assembly itself.
PetSafe's sliding glass pet door line works exactly this way: the Freedom Patio Panel "quickly installs into your human sliding door track" and goes in "without cutting or drilling into your door frame," according to PetSafe's product page. The panel replaces a vertical section of your existing track, the pet flap is integrated into that panel, and the whole assembly "locks securely in place using included hardware" including a latch kit and closing panel.
That design means the job is a fitment and leveling task, not a glass fabrication task. The panel must match your door's track height — PetSafe's patio panel is available in an 81-inch height option, among others — and it needs to be plumb and secure enough to hold against daily pet use and wind pressure. A handyman who has done this before may finish in under two hours, but fitment, latch alignment, and security checks can take longer; if the track is non-standard or the door system is proprietary, a specialist is the safer call. Someone who has not needs to read the instructions carefully because a poorly fitted panel can rack in the track, gap at the edges, and leak cold air all winter.
The cost range for a patio-panel install is lower on materials than a wall job (the panel itself typically runs $100–$250) but requires attention to fit and sealing at the track edges. If your sliding door is non-standard in height or uses a proprietary track system, verify compatibility before purchasing.
What drives pet door installation prices up or down?
According to HomeGuide, the main price variables are size, materials, features, and labor type. Homewyse is also commonly used by homeowners to sanity-check labor estimates, especially when comparing a handyman’s hourly rate against a specialist quote. Here is how each one moves the number in practice:
PriceFactors — 6 variables that change your total cost: - Pet door size: A small cat door flap costs less to buy and less to cut than an extra-large breed door. Larger openings mean more material removed, more framing risk, and heavier hardware. - Door or wall material: Hollow-core interior doors are easiest and cheapest to cut. Solid wood, fiberglass, steel-core exterior doors, HardiePlank siding, stucco, or brick each add complexity and time. - Exterior vs. interior location: Any exterior penetration needs weatherproofing — flashing tape, silicone sealant, weatherstripping, and sometimes exterior trim. Interior jobs skip most of that. - Weatherproofing scope: A door cutout in a mild climate needs less sealing than a wall install in Minnesota. Climate drives how much sealant, insulation, and labor time goes into the weather barrier. - Labor type — handyman vs. specialist: Handyman rates run $30–$80/hour. A licensed carpenter, door specialist, or glazier typically charges more, but some jobs require that level of expertise. - Features on the unit itself: A basic single-flap insert costs far less than a locking, insulated, or electronic model. Labor time also goes up slightly for units with more complex hardware.
Pet door size, material, and locking features
Size is the first filter. The opening must be matched to your pet’s shoulder width and the door type, not just the size on the package. A small cat door is a quick, low-risk cut. An extra-large dog door for a 100-pound Labrador means a significantly larger opening, heavier frame hardware, and more material to remove — all of which add time and cost.
Locking features add cost at the product level but are often worth it. PetSafe's patio-panel design integrates a closing panel and latch kit as part of the standard product architecture — not an optional add-on. For door and wall installs, look for a sliding lock panel that blocks the flap when you need to restrict access (overnight, during home repair work, or in rental situations where you need to restore the door temporarily).
PetSafe's Wall Entry Pet Door sizes accommodate wall thicknesses from 4¾ to 7¼ inches, with an extension tunnel for walls that exceed that range. Getting the size match right at purchase saves a return trip and a re-cutting fee.
Why exterior-wall and glass jobs cost more than door cutouts
TradeSkillComparison:
Scope Handyman Carpenter/Door Specialist Glazier Interior door cutout ✅ Standard scope Not needed Not needed Exterior door cutout ✅ With weatherproofing experience Useful if framing is involved Not needed Exterior wall penetration ⚠️ Depends on framing/siding type ✅ Recommended for framing Not needed Patio panel insert ✅ If familiar with sliding track systems Not needed Not needed Cut-through glass install ❌ Not in scope ❌ Not in scope ✅ Specialty only
Wall jobs cost more because they require more trades knowledge and more materials. HomeGuide confirms that exterior doors can require "additional framing, flashing, and load-bearing headers." Even if the wall location avoids a load-bearing stud, you still need to frame the rough opening cleanly, flash the exterior, and seal the interior against moisture and drafts.
Glass jobs are their own category. The replacement-panel approach PetSafe uses sidesteps the need to cut tempered glass — which is not a job for a handyman or a general carpenter. If someone quotes you a "cut-through glass" install on a standard tempered sliding door, that is a red flag; tempered glass cannot be re-cut once tempered. The panel-replacement method is the correct and verified approach.
Quotes that exclude materials, patching, or paint
QuoteExclusionWarning: Before you sign off on a handyman quote, confirm in writing what is and is not included: - Materials (the pet door unit itself, screws, sealant, weatherstripping) - Patching (filling gaps around the frame, patching drywall on a wall install) - Paint or stain touch-up on the door face or interior trim - Cleanup and disposal of cut material, sawdust, and packaging - Call-out fees — some handyman services charge a minimum trip fee on top of hourly labor
HomeGuide's labor-only rate of $30–$80/hour is exactly that: labor only. Materials, patching, and paint are separate line items in most itemized handyman quotes. A $75 labor quote that becomes a $250 final invoice is not unusual when those extras are added back in. Ask for a total-project number, not just a labor rate, and compare quotes on the same scope.
When is a handyman the right hire for pet door installation?
DIY vs Pro: A handyman handles basic wood-door cutouts cleanly. A carpenter or door specialist is better for exterior-wall framing. A glazier is the only correct choice if actual glass cutting is involved, while a patio-panel insert remains a handyman-friendly track-fit job when the dimensions are standard.
A handyman service is the right call for most standard pet door installs — but "standard" has a real definition. Per Fixtman's handyman overview, pet door installation is within handyman scope alongside general door work and home repairs, and Fixtman says customers should verify insurance and service scope before hiring. That is the line between a quick cutout and a job that needs framing or specialty glass work.
Labor runs $30–$80/hour for a handyman, with the lower end of that range typical in smaller markets and the upper end in high-cost-of-living cities like San Francisco, Seattle, or New York. Platforms like Thumbtack and HomeGuide let you compare handyman quotes in your ZIP code before committing.
Handyman checklist: insurance, door cutout experience, cleanup, and weather sealing
VettingChecklist — confirm these before you hire: - Liability insurance: Ask directly. Fixtman explicitly advises that customers verify insurance before any handyman hire. If they hesitate or can't produce a certificate, move on. - Prior door-cutout photos: Ask for examples of previous pet door or door-cutout installs — finished photos, not just in-progress shots. Clean, flush frame seating is the mark of an experienced hand. - Weather-sealing knowledge: Do they know what silicone sealant and weatherstripping do, and where each goes? PetSafe's installation kit provides both for a reason — a handyman who skips sealing leaves you with a draft-prone install. - Trim and finish scope: Will they install interior trim around the frame, or is that extra? Confirm in writing. - Cleanup and disposal: Confirm sawdust, cut material, and packaging are removed at job's end. - Experience with your door type: Hollow-core, solid wood, and fiberglass each cut differently. Steel-core exterior doors should raise a flag — confirm they have done it before.
PetSafe's Pet Door Installation Kit provides clear silicone sealant and extra weatherstripping for "more weather resistance," which is exactly what you want a handyman to understand before the first cut is made.
When you need a door specialist, glazier, or carpenter instead
When to Call a Pro: - The installation goes into an exterior load-bearing wall — a carpenter or structural contractor needs to assess header framing before cutting - The exterior cladding is HardiePlank fiber-cement siding, stucco, or brick — these materials require specialty cutting tools and sealing techniques beyond standard handyman scope - The job involves cutting through actual tempered glass — this is glazier territory only, and the panel-replacement method for sliding doors exists precisely to avoid this - The patio-panel insert involves a non-standard track height or proprietary sliding-door system — a door specialist can verify fit before purchase - The door or wall assembly carries a manufacturer's warranty that a cutout would void — confirm before cutting anything - An HOA or rental agreement restricts modifications — get written approval first, or the install becomes a liability whether it's done by a handyman or a specialist
PetSafe acknowledges this scope split directly: its Wall Entry Pet Door is described as "the best option for homes where door installation isn't possible" — which means the two install types serve different constraints, not just different preferences.
DIY pet door installation: when it is realistic and when it is not
DIY saves you the $50–$400 in labor that a handyman or specialist would charge, using HomeGuide's verified labor range of $30–$80/hour as the benchmark. Whether that savings is worth the risk depends entirely on the install type.
DiyVsProCallout: - Interior or hollow-core door cutout: DIY is realistic with basic power tools and careful measuring - Exterior door cutout: DIY is doable but requires weatherproofing discipline; one missed seal gap costs you in heating and cooling bills - Patio-panel insert: DIY is feasible if you follow manufacturer fitment instructions precisely - Wall install: DIY is not recommended unless you have framing experience — structural errors and moisture intrusion are expensive to fix - Any glass cutting: Not a DIY project
DiyReadinessChecklist — confirm before you start: - Do you have a jigsaw, drill, tape measure, and level? - Is the door hollow-core or solid wood (cuttable), or fiberglass/steel-core (verify first)? - Does your HOA or rental agreement permit modifications? Get it in writing. - Are you comfortable with weatherstripping and silicone sealant application? - What is your tolerance for a draft if the seal is imperfect on an exterior install?
DIY-friendly installs on wood or hollow-core doors
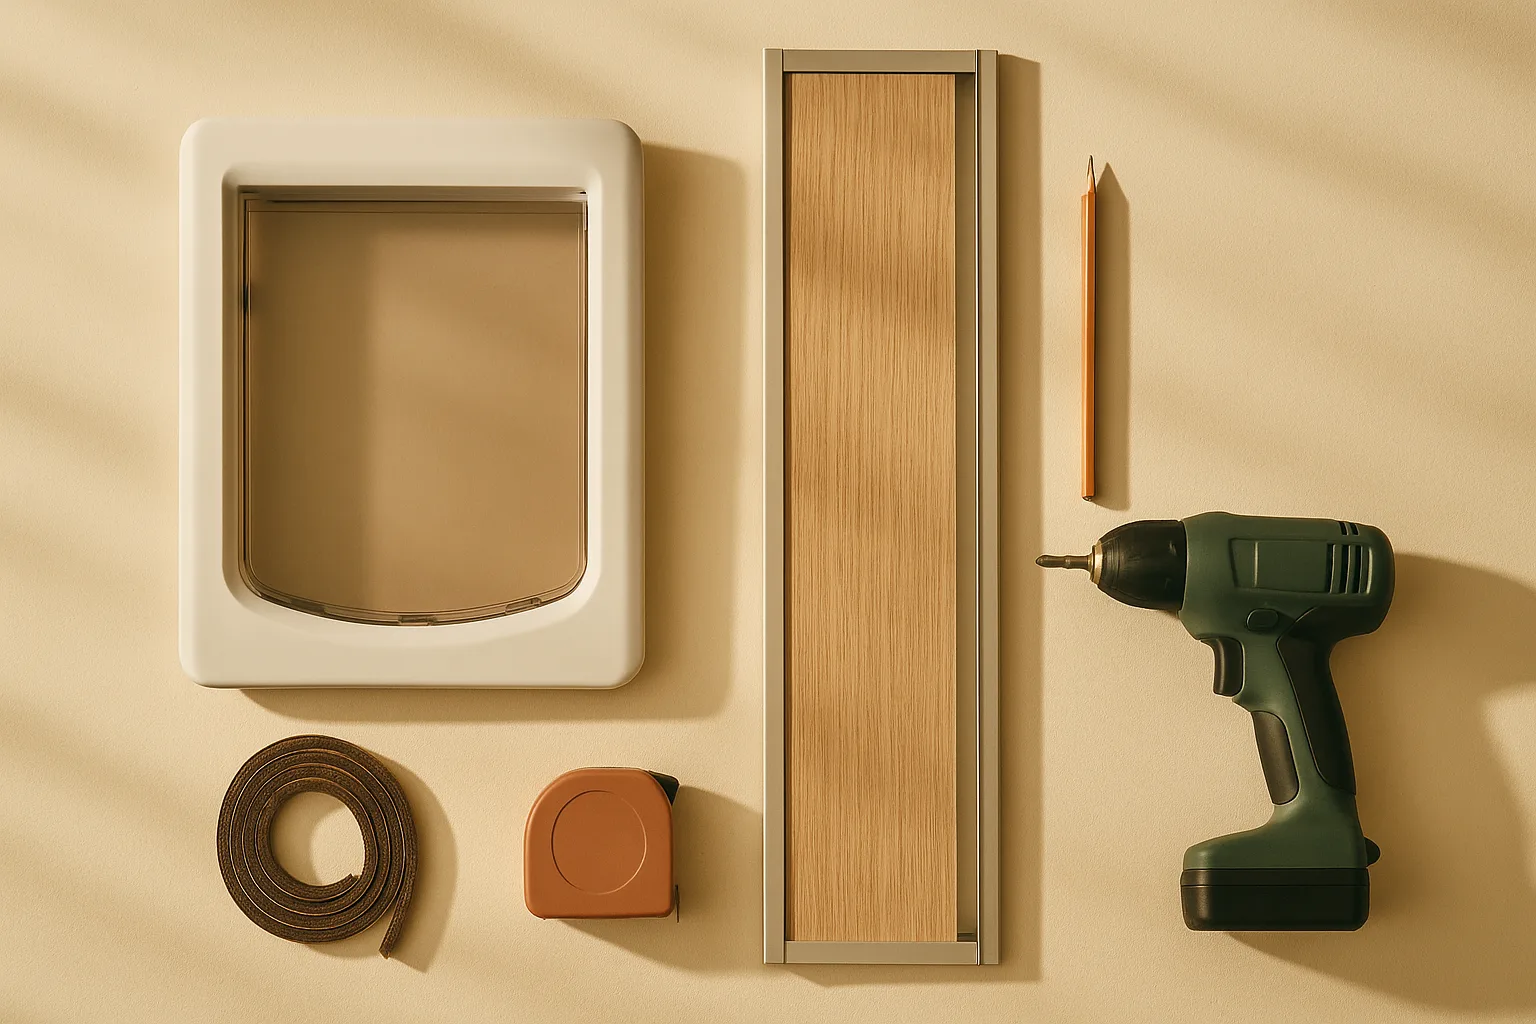
StepCard — basic tool set for a door cutout install: 1. Measure your pet (shoulder height and width) and select the correct flap size 2. Confirm the door material can be cut — hollow-core and solid wood yes; steel-core and some fiberglass, verify with the door manufacturer 3. Mark the template using the included cutting guide; center the opening carefully 4. Drill a starter hole in each corner of the cutout area 5. Cut with a jigsaw along the template lines — slow, controlled passes 6. Test-fit the frame before final fastening 7. Install hardware per the manufacturer's guide, adding silicone sealant at the exterior frame edge on any exterior door 8. Check for gaps around the entire frame perimeter and seal any drafts
HomeGuide notes that trimming and fitting a same-size interior door runs $30–$70 in professional labor — which gives you a concrete sense of what a successful DIY install saves you. That said, confirm that patching or paint touch-up, if needed, is factored into your time budget. A clean cutout on a painted hollow-core door usually requires at least a light sanding and touch-up coat around the frame.
Why DIY is risky for exterior walls, insulation, and glass
Pet Door Products' wall-install guide makes the complexity plain: the job requires cutting through drywall and insulation, framing the opening, and then sealing and insulating for energy efficiency. Each of those steps has a failure mode that causes a long-term problem.
RiskFactor list — what goes wrong with DIY wall and glass installs: - Drafts: An improperly sealed wall opening pulls cold or hot air through the insulation gap continuously — a small error that compounds into meaningful energy loss over a heating season - Moisture intrusion: Without proper flashing tape at the exterior opening, rainwater wicks into the wall cavity, where it damages insulation, promotes mold, and rots framing silently over months - Security gap: A loose-fitting frame — especially on an exterior wall or patio panel — is a vulnerability. The hardware must be secure, and the closing/locking panel must seat properly - Fitment failure on patio panels: A patio panel that is off by even a quarter-inch in height can rack in the track, gap at the edges, and refuse to lock cleanly - Framing errors near load-bearing elements: Cutting into a wall without checking for load-bearing studs is a structural risk; the wrong cut in the wrong wall requires a permit and a structural fix that will cost multiples of what a specialist would have charged upfront
The glass install risk is straightforward: standard tempered glass used in sliding patio doors cannot be re-cut once manufactured. Any approach that involves cutting through the glass itself requires a glazier and custom-ordered glass. The patio-panel insert approach exists specifically to avoid that entire scope.
How to choose a pet door that matches your opening and climate
Start with your opening type, not the pet. PetSafe organizes its product line around the three install types — wall-entry units, door-mounted inserts, and sliding-glass patio panels — because the opening determines what the unit needs to do before climate or pet size even enters the picture.
AffiliateProductCard: For an existing door, a door-mounted PetSafe insert gives you a straightforward cutout with a standard flap and simple lock panel. For a wall, a PetSafe Wall Entry Pet Door is the fit-to-thickness choice, with an extension tunnel when needed. For a sliding door, the PetSafe Freedom Patio Panel is the lockable track insert built for panel replacement, not glass cutting.
Decision guide by opening type:
- Existing door: Choose a door-mount insert sized to your pet's shoulder height plus 2 inches. Confirm the unit's frame fits within the door's stile width (the vertical edge of the door) so there is solid material to fasten into.
- Wall install: Match wall thickness to the unit's rated range; buy the extension tunnel at the same time if your wall is near the upper limit. Factor in exterior cladding type before cutting.
- Sliding glass/patio door: Match panel height to your door's track height. Verify the panel includes a closing panel and latch for overnight security.
Climate tier:
- Mild climates (USDA hardiness zones 8–10): A single-flap with basic magnetic seal is adequate
- Cold climates (zones 3–6): Look for a double-flap or insulated flap design and plan to apply extra weatherstripping at the frame perimeter
Insulated flaps, locking panels, and energy efficiency
The features that most reduce drafts and heat loss are the ones tied directly to the seal architecture. PetSafe's patio-panel product includes a closing panel that blocks the pet opening entirely when not in use, plus a latch kit that locks the human door — so the energy and security question is addressed at the product level, not just through installation technique.
PetSafe's Pet Door Installation Kit supplies clear silicone sealant and extra weatherstripping to create "more weather resistance" around the frame — a useful addition for any exterior install, whether door, wall, or patio panel. Apply silicone sealant at every frame-to-surface joint on the exterior side, and use weatherstripping on any interior frame edges that contact the door or wall surface.
Feature comparison:
| Feature | What It Does | Worth It? |
|---|---|---|
| Magnetic seal on flap | Keeps flap closed between uses, reduces drafts | Yes, for any exterior install |
| Closing/lock panel | Blocks opening entirely; adds security overnight | Yes, especially for patio panels |
| Double or insulated flap | Adds thermal barrier in the flap itself | Yes, in cold climates |
| Electronic/microchip lock | Only opens for your pet's chip or collar tag | Higher cost; useful for multi-pet households |
PetSafe and K&H options commonly used in U.S. homes
PetSafe is the most thoroughly documented pet door brand for U.S. wall-entry and sliding-glass applications, with verified products across all three install types available through its official store and major retail partners including Chewy, Amazon, and PetSmart. Its wall-entry and patio-panel lines are the most frequently referenced in installation guides and handyman service discussions.
K&H Pet Products is a well-regarded U.S. pet brand known for heated beds and outdoor pet shelters; however, specific K&H pet door models were not verifiable in current product listings at time of publication. If you are sourcing from a Chewy or Petco order, filter by install type and wall-thickness compatibility first, then compare brand options within those results.
Pet door installation FAQ
How much does it cost to install a dog door?
Cost range: $200 to $800 or more for materials and labor combined, according to HomeGuide's dog door installation cost guide.
The low end of that range reflects a basic handyman install in an existing hollow-core door with a mid-range unit. The high end covers exterior-wall penetrations with framing, weatherproofing, and a premium or large-breed door. Labor runs $30–$80 per hour, so the number of hours on-site is the most controllable variable — a simple door cutout takes one to two hours; a wall install can take four or more.
Can a pet door be installed in a sliding glass door?
Yes — but not by cutting through the glass. The correct method is a patio-panel insert that replaces a section of your sliding door's track. PetSafe's sliding glass pet doors "work by replacing a section of your sliding door track with a panel that includes an integrated pet flap," and the panel locks in place with included hardware.
This approach is DIY-feasible for most homeowners if the panel matches your door track height. For non-standard track dimensions or proprietary sliding door systems, a door specialist can verify fit before you purchase the unit.
Do dog doors affect insulation and security?
They can — but a properly installed unit with the right features mitigates both concerns. PetSafe's patio-panel design includes a closing panel for the pet opening and a latch kit for the human door, directly addressing the security question. The companion Pet Door Installation Kit adds weatherstripping and silicone sealant for "more weather resistance" at the frame perimeter.
The biggest insulation risk is an improperly sealed frame — gaps between the pet door frame and the surrounding door or wall material let air move freely regardless of how good the flap is. On any exterior install, apply silicone sealant at all frame-to-surface joints, confirm the flap's magnetic seal closes fully, and use a closing panel overnight or when the door is not needed. A correctly installed unit with a double flap or closing panel performs materially better than a single open flap with no seal.
Sources & References
- Fixtman — Professional Handyman Services: Hiring Pros for Home Projects — Ground truth source confirming handyman scope for pet door installation and insurance/vetting guidance
- HomeGuide — Dog Door Installation Cost — Primary cost range: $200–$800+ for materials and labor
- HomeGuide — Cat Door Installation Cost — Cat door cost range: $150–$500
- HomeGuide — Dog Door Installation (labor rates) — Labor rate: $30–$80/hour; exterior framing and header requirements
- HomeGuide — Door Installation Cost — General door installation averages $750, ranging $340–$1,500
- HomeGuide — Interior Door Installation Cost — Trimming and fitting same-size door: $30–$70
- PetSafe — Freedom Patio Panel (81 in.) — Verified quote: installs without cutting or drilling into door frame
- PetSafe — Sliding Glass Pet Doors — Panel-replacement install method for sliding glass/patio doors
- PetSafe — Wall Entry Pet Door (product page) — Wall thickness range: 4¾–7¼ inches; installation notes
- PetSafe — Wall Entry Pet Door (product listing) — Confirmed as best option for homes where door installation isn't possible
- PetSafe — Pet Door Installation Kit — Silicone sealant and weatherstripping for improved weather resistance
- Pet Door Products — Dog Door Wall Installation Guide — Step sequence: cut opening, install frame, seal and insulate
Keywords: PetSafe, K&H Pet Products, sliding glass door panel insert, tempered glass, weatherstripping, flashing tape, exterior trim, silicone sealant, HardiePlank siding, load-bearing wall, HOA restrictions, rental agreement, Homewyse, HomeGuide, Thumbtack