Cellulose insulation can be blown directly into existing wall cavities through two small holes per stud bay — no drywall tear-out required. The technique, confirmed in This Old House's retrofit cellulose guide published April 22, 2026, uses a rented insulation blower and a 1 1/8-inch spade bit to fill each cavity from the inside out. For most exterior walls in a standard wood-framed house, it's a weekend project that meaningfully cuts heating and cooling loads — and it may qualify for up to $1,200 in federal tax credits under the Energy Efficient Home Improvement Credit.
That said, this method is not for every wall in every house. Read through the full guide before picking up a drill.
Cellulose insulation retrofit for existing walls: time, tools, skill level, and when it works
Retrofit cellulose — sometimes called drill-and-fill or closed-cavity retrofit — fills existing wall cavities with dense-pack cellulose through minimal access holes, leaving the wall surface largely intact. This Old House confirms that the method works on existing exterior walls without major demolition, using a blower you can rent rather than buy. The guide was published on April 22, 2026, and it remains a useful reference for the two-hole approach.
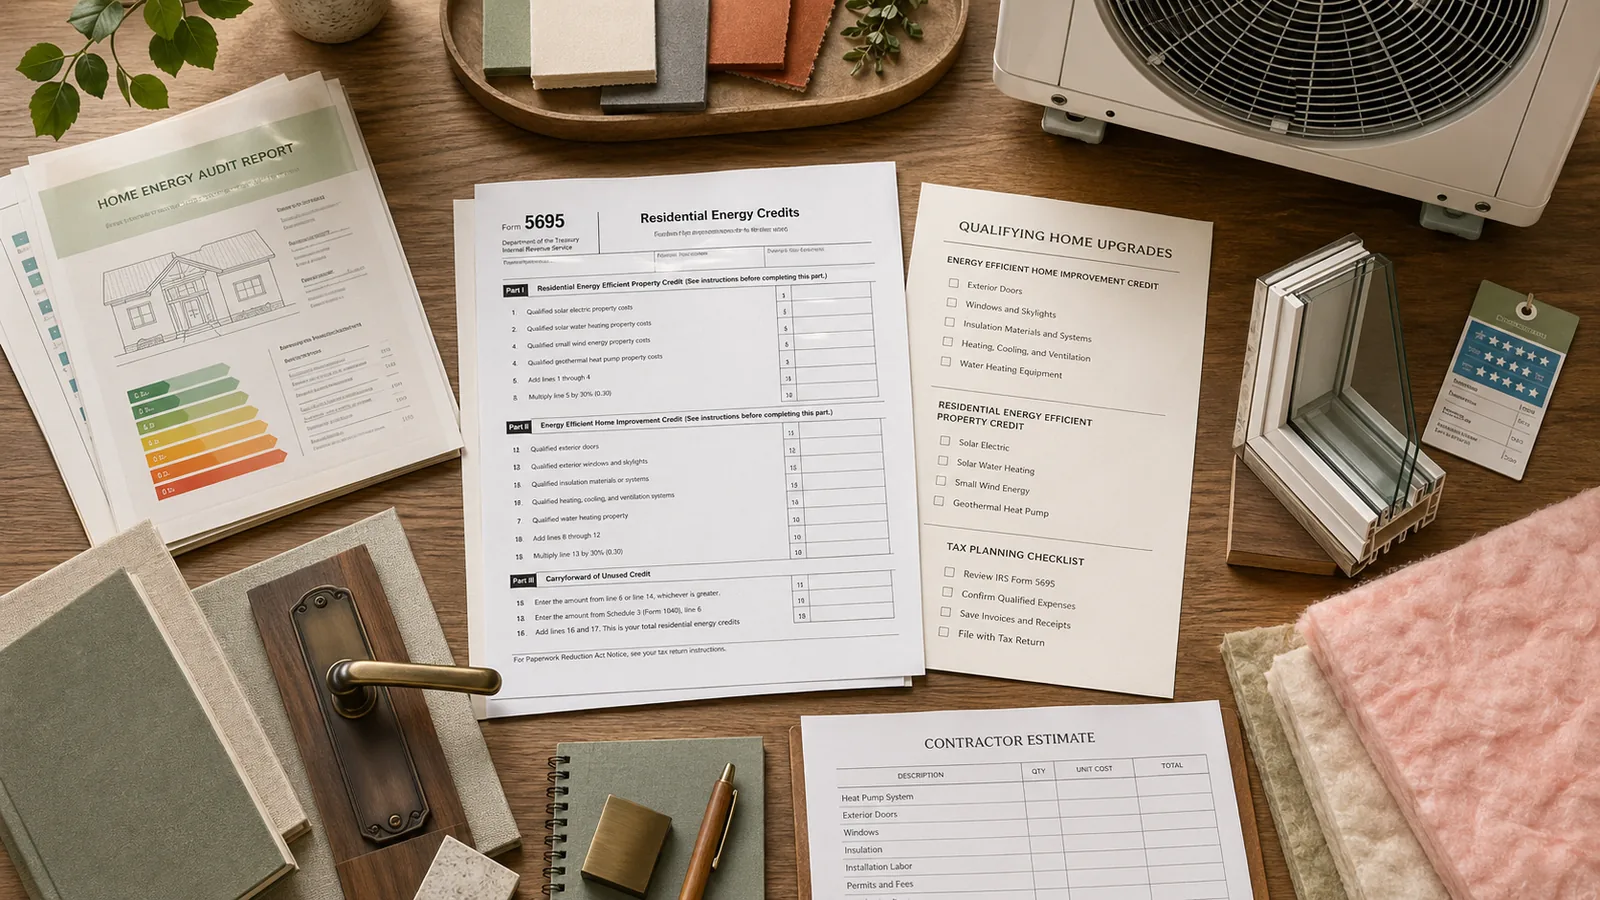
At a Glance: - Difficulty: Moderate (drilling, blowing equipment, patching required) - Time estimate: 45–90 minutes per stud bay including patching; plan a full weekend for a single exterior wall in a typical room - Skill level: Confident DIYer comfortable with power tools, ladders, and basic patching - This is a wall retrofit guide — not an attic insulation guide and not a dense-pack-only contractor tutorial - Tax credit potential: Up to $1,200 in a single year via the federal Energy Efficient Home Improvement Credit; ENERGY STAR says qualifying insulation upgrades can reach that annual cap, and IRS Form 5695 is the form used to claim residential energy credits
This approach works best on uninsulated exterior walls with standard 2×4 or 2×6 wood framing, no known wall cavity obstructions, and accessible surfaces — whether drywall or plaster. It does not work well (or safely, without professional assessment) where the wall assembly is unknown, where moisture damage is present, or where hazardous materials may exist. Those situations are covered in the red-flags section below.
One practical tax-credit note: the IRS specifies that the home must be an existing U.S. main home — not a new build — and you must claim the credit for the tax year in which the insulation is installed, not the year you bought the bags. File using Form 5695.
Materials and tools for drill-and-fill wall insulation
Pull this list together before you rent the blower. Missing one item mid-job — especially the right bit size — turns a Saturday project into a two-day scramble.
Tools:
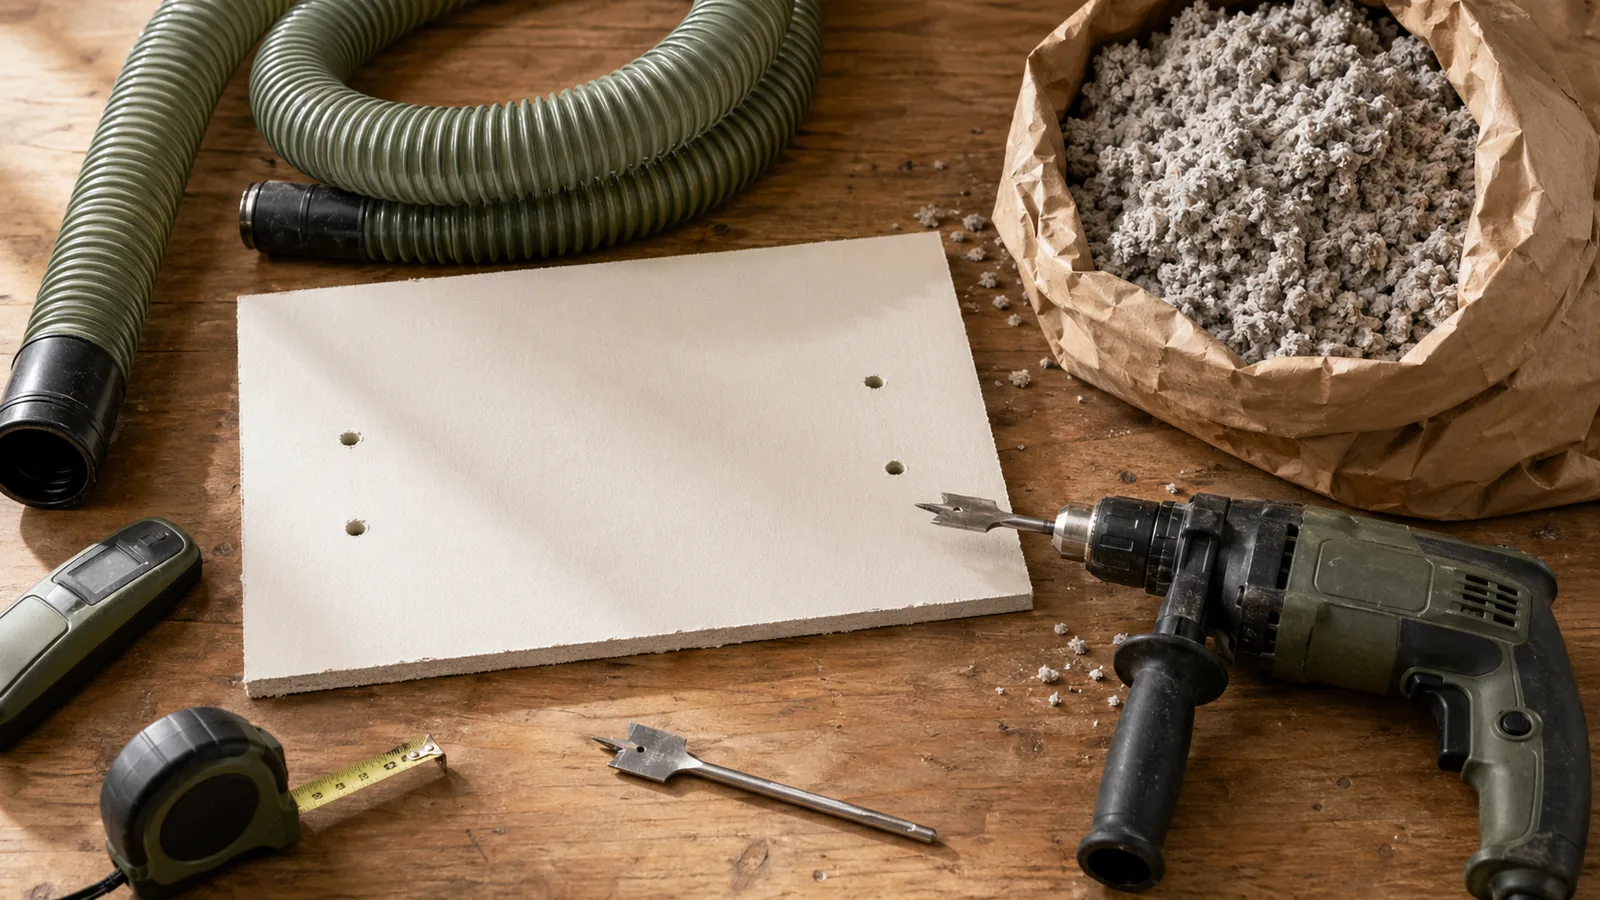
- Drill/driver with a 1 1/8-inch spade bit — this is the specific hole size the This Old House retrofit method specifies; don't substitute a smaller bit hoping to minimize patch work, the fill hose needs clearance
- Hammer — for tapping in galvanized finishing nails during the patch
- Utility knife — for scoring drywall plugs or cutting patch material cleanly
- Insulation blower (rentable) — available at most Home Depot and Menards tool-rental counters; confirm the rental includes a fill hose long enough to reach the bottom of an 8- or 9-foot wall cavity
- Ladder — a 6-foot step ladder works for standard 8-foot ceilings; taller walls need an extension ladder or scaffold plank
- Caulk gun
- Stud finder (magnetic or electronic) — essential for mapping bay locations before drilling
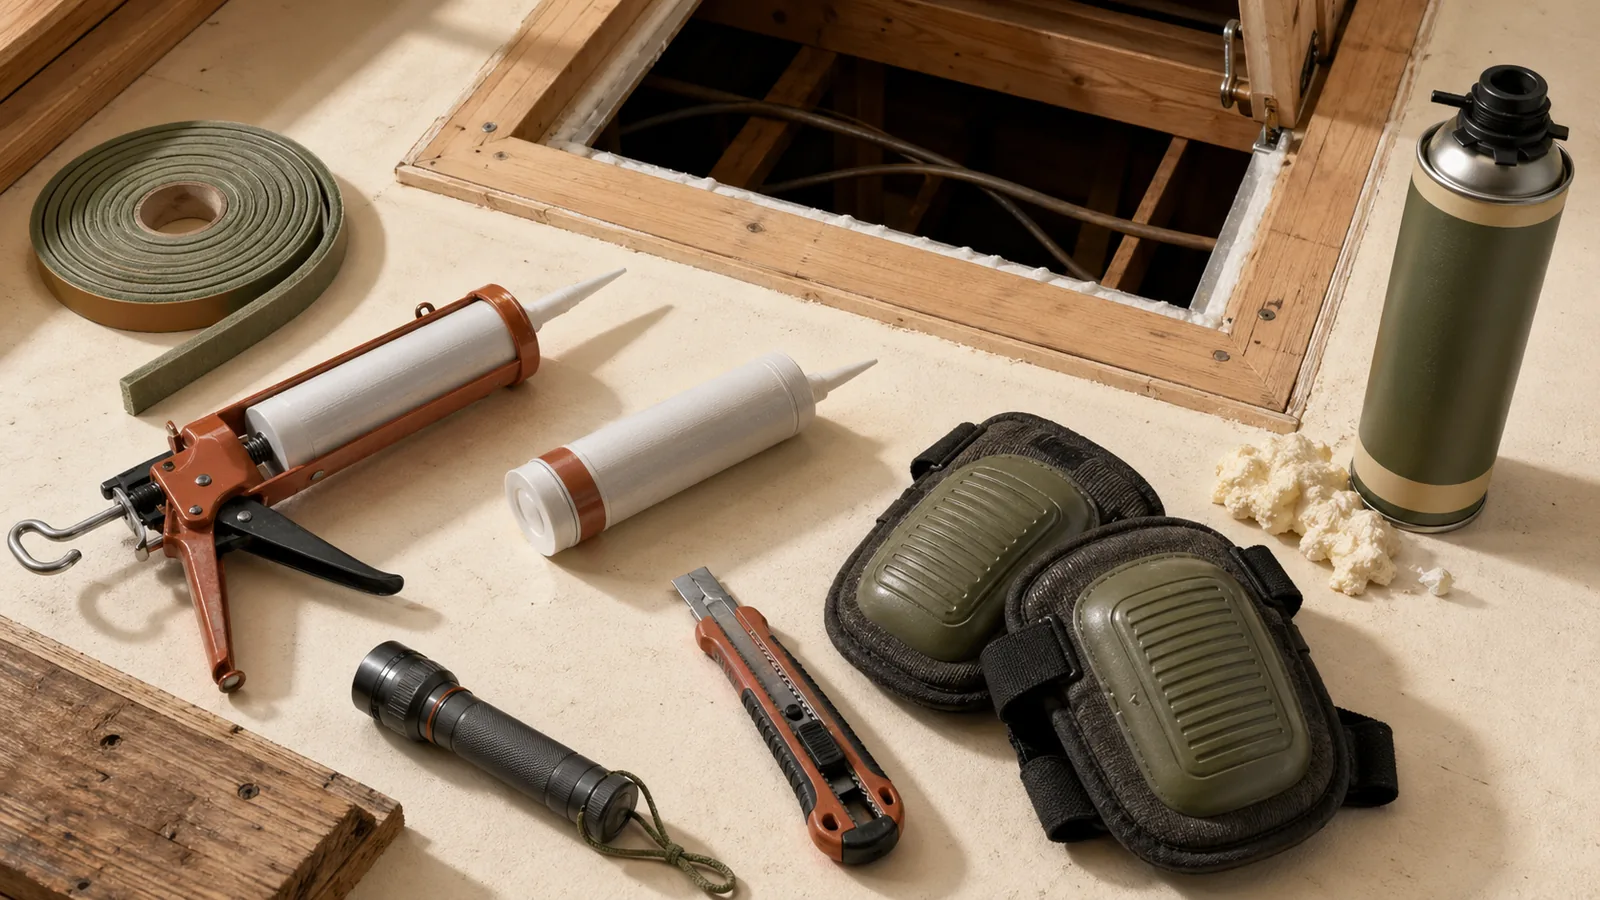
- Safety glasses and N95 respirator — cellulose dust is fine and irritating; don't skip these
Materials:
- Cellulose insulation — sold in bags; brands like GreenFiber and SANCTUARY (formerly Nu-Wool) are widely stocked at big-box stores; calculate bags by cubic footage of wall cavity (stud depth × bay width × wall height), then add 10% for settling
- Silicone caulk — specified by This Old House for sealing the access holes
- Galvanized finishing nails — for fastening patch plugs back in place
- Drywall patch material — 1 1/8-inch hole plugs or small drywall squares if you're cutting larger access patches; joint compound and mesh tape if a skim coat is needed
- Primer and paint — to match the existing wall finish after patching
Pro Tip: Ask the rental desk what minimum bag purchase triggers free blower rental — Home Depot and Menards frequently waive the blower rental fee when you buy a set minimum number of bags. Buy your bags there even if a competing store is slightly cheaper on the product itself.
The DOE's wall-retrofit guidance identifies dense-packed cellulose as one of the primary closed-cavity retrofit options for existing wall assemblies — right alongside dense-packed fiberglass — so this is a well-established approach, not a fringe technique.
How to identify stud bays, wiring, plumbing, and fire blocking before drilling
Every hole you drill commits you to a patch. Mapping the wall carefully before you touch the drill saves you from wasted holes, damaged wiring, and the particular misery of discovering fire blocking after you've already started filling.
Pre-drill inspection checklist:
- [ ] Shut off electrical circuits serving the wall you're working on at the breaker panel. Even if you don't plan to drill near outlets, cellulose can shift wiring and drill bits can wander.
- [ ] Use a stud finder to mark every stud edge along the full height of the wall. Mark both sides of each stud so you know the actual bay width (typically 14.5 inches for 16-inch on-center framing, or 22.5 inches for 24-inch on-center).
- [ ] Look for any outlets, switches, or light fixtures in the bay — these indicate wiring running through the cavity. Note their position before drilling.
- [ ] Check for plumbing: exterior walls on kitchens or bathrooms sometimes contain supply lines or drains. If you hear water in the wall or see pipe access points nearby, probe carefully or consult a plumber before proceeding.
- [ ] Knock along the wall with your knuckles. A dull thud suggests an existing obstruction or fill; a hollow knock suggests an empty cavity. This is imprecise but useful as a first screen.
- [ ] On older homes (pre-1970s), check for horizontal fire blocking — a horizontal 2×4 installed mid-wall height to slow fire spread. If your knock test shifts from hollow to solid at mid-wall (roughly 4 feet up on an 8-foot wall), fire blocking is likely present and the two-hole method still works, but you may need additional access holes above and below the block.
Stud-bay mapping method:
Mark each stud location on a piece of painter's tape running horizontally at about 4 feet height. Note bay numbers left to right. Before drilling, photograph the marked wall so you have a record of stud, outlet, and obstruction positions. This also helps when patching — you'll remember exactly which bay had the blocked lower section.
Watch Out: DOE explicitly notes that closed-wall retrofit methods are limited to accessible stud bays and confirmable cavities. Unknown wall construction — diagonal sheathing, double-stud assemblies, SIPs panels, or ICF — is not a DIY candidate. If you cut a hole and find anything other than an open stud bay with standard insulation-free framing, stop and call an insulation contractor.
Plaster vs. drywall:
Drywall is forgiving — a 1 1/8-inch hole is easy to patch. Original plaster-over-lath walls are more fragile. Drilling can crack the surrounding plaster keys (the plaster that oozes through lath gaps and hardens to lock everything in place). On plaster walls, use a sharp bit, run it slowly, and consider drilling from the exterior siding instead if the exterior is clapboard or easily re-sealed. Historic plaster in good condition deserves extra caution — if you have original horsehair plaster you want to preserve, this is a pro job or at minimum a very careful one with test holes first.
Where to drill the two access holes in each wall bay
Each stud bay needs exactly two holes: one low and one high. The sequence matters — you fill from the bottom up.
[Image: Stud bay cross-section showing lower hole placement 4–6 inches above the floor plate and upper hole placement 4–6 inches below the top plate, with blower hose inserted through lower hole first]
StepCard 1 — Mark the lower hole.
- Mark the lower hole at roughly 4 to 6 inches above the floor (above the baseboard, or behind it if you remove the baseboard first). Center the mark horizontally within the stud bay. This hole is your primary fill port — the blower hose feeds down and then fills upward.
StepCard 2 — Mark the upper hole.
- Mark the upper hole at roughly 4 to 6 inches below the top plate (just below where the wall meets the ceiling, or just below the top of the window/door rough opening if that's the top of the bay). This hole allows displaced air to escape as cellulose fills from below, and it lets you verify the cavity is filling completely to the top.
StepCard 3 — Drill and probe.
-
Drill both holes with the 1 1/8-inch spade bit before you start filling. Run the drill at moderate speed — pushing too fast through drywall creates a ragged hole that's harder to patch cleanly.
-
Probe each hole with a long screwdriver or the blower hose itself to confirm the cavity is clear. If the probe hits something solid within a few inches — fire blocking, existing insulation, a horizontal bracing member — note it and plan additional holes above or below.
StepCard 4 — Confirm alignment.
- Confirm hole alignment: both holes should be clearly within the stud bay, not clipping a stud edge. A hole that grazes a stud creates a partial seal that causes cellulose to back-blow out around the hose.
Pro Tip: On the exterior side of the wall, if you have accessible wood clapboard siding, some contractors prefer to drill through the siding and sheathing instead of through the interior finish. This avoids visible interior patches entirely — you just re-seal the siding hole with a colored caulk or matching plug. The same two-hole per bay logic applies.
The 1 1/8-inch spade bit is the specific size called for in the This Old House method. Larger holes make patching more involved; smaller holes may not clear the fill hose diameter reliably.
How to blow cellulose into existing walls with a rented insulation blower
A rented insulation blower is the difference between this being a practical DIY and an impossible one. Hand-packing cellulose into a closed wall cavity doesn't work — you can't get adequate density, and poorly packed cellulose will settle over time, leaving an uninsulated gap at the top of the cavity. The blower creates the pressure needed for proper dense-pack installation.
Renting the blower:
Home Depot's tool-rental department carries insulation blowers; Menards and many independent rental centers stock them as well. Confirm when you call that the unit comes with a fill hose — you need a hose, not just the machine. Blower rental typically runs a half-day or full-day rate. Plan to do all your bags in a single rental period to avoid double charges.
Fill sequence — step by step:
-
Load bags into the blower hopper per the rental unit's instructions. Don't overfill the hopper — cellulose clogs if packed too tight above the shredder.
-
Insert the fill hose into the lower hole and feed it down toward the bottom of the wall cavity. You want the hose tip near the floor plate.
-
Start the blower and begin filling. Keep the hose inserted while the machine runs — pulling it out prematurely vents a cloud of cellulose dust into the room.
-
Slowly withdraw the hose upward as the cavity fills. You're not trying to jet all the material in from one position — you're packing it densely as you pull back toward the hole.
-
Watch and listen for the stop signal: This Old House specifies that the cavity is full when the blower motor starts to strain. This is your cue to stop — the resistance means cellulose has packed tightly enough that the machine can no longer push more material in. Forcing it past this point risks blowing back material or damaging the rental unit.
-
Move to the upper hole and insert the hose briefly to confirm fill density at the top of the cavity and to pack any gap near the top plate. The upper hole doubles as a vent during lower filling and a verification/top-up port when the lower fill is complete.
-
Repeat for every stud bay on the wall section before moving to patching. Keep a count of bags used per bay — this helps you estimate for remaining walls and confirms you're achieving adequate density.
Watch Out: If cellulose starts blowing back out of the hole around the hose, the cavity is full or nearly full. Stop immediately — continuing overloads the blower and pushes material into the room rather than the wall. This back-blow is the mechanical version of the motor-strain signal.
The DOE confirms that dense-packed cellulose in wall cavities provides meaningful air-sealing benefits beyond just thermal resistance — the material fills gaps and small voids that significantly reduce infiltration within the stud bay itself.
How to patch, seal, and finish the access holes after insulation
Patching is what separates a finished room from a construction zone. Done right, a 1 1/8-inch hole disappears under paint. Done poorly, it telegraphs through your wall finish for years.
Finish-patch sequence:
-
Wipe excess cellulose from around the hole with a dry rag before any caulk or compound touches the surface. Any cellulose fiber caught under the patch creates a bump.
-
Cut a plug from a scrap of matching drywall (if the wall is drywall) or use a commercial hole-plug button for sub-1.5-inch holes. Press the plug into the hole firmly.
-
Nail the plug in place with galvanized finishing nails driven into the surrounding wall surface — as specified by This Old House. Galvanized nails resist the slight moisture that cellulose can hold during humidity cycling; plain steel nails can rust and stain the finish coat.
-
Apply silicone caulk around the perimeter of the plug, sealing the joint between the plug and the surrounding wall material. Silicone provides a flexible, durable seal that moves with seasonal expansion and contraction. Tool the caulk smooth with a wetted finger.
-
Let the caulk cure fully per the manufacturer's spec (typically 24 hours for silicone) before applying joint compound over it. Silicone doesn't accept paint directly — if you want to paint over the patch, apply a thin skim of joint compound over the caulked and nailed plug, let it dry, sand smooth, prime, and paint.
-
Sand and prime the patched area before topcoating. A small foam roller gives a texture closer to the surrounding wall than a brush.
Cleanup checklist:
- [ ] Vacuum cellulose dust from the floor and baseboard before it migrates to other rooms
- [ ] Wipe the wall surface with a barely damp cloth to remove any cellulose film before priming
- [ ] Return the rental blower with the hose cleaned out — rental agreements typically require you to return equipment in the condition received, and clogged hoses may mean a cleaning fee
- [ ] Dispose of empty cellulose bags per local recycling guidelines (most are recyclable paper)
Pro Tip: On plaster walls, use setting-type joint compound (like Durabond 45) rather than standard all-purpose compound for the skim coat over the patch. It bonds better to plaster substrates and is less prone to shrinkage cracking around the rigid plug.
When retrofit cellulose is the right choice versus hiring an insulation contractor
The drill-and-fill method is genuinely DIY-friendly for the right house and the right wall. But the decision to do it yourself versus calling an insulation contractor hinges on a few concrete factors.
DIY vs Pro: Retrofit cellulose is a strong DIY candidate when: walls are standard 2×4 or 2×6 wood framing, the surface is drywall in good condition, cavities are empty (confirmed by probing), no hazardous materials are present, and you're comfortable operating rental equipment and making clean patches. It tips toward a pro when: the wall assembly is unknown or unusual, plaster is historic or fragile, obstructions prevent full-cavity fill, or moisture damage is present.
Conditions that suit DIY retrofit cellulose:
| Condition | DIY-friendly? | Notes |
|---|---|---|
| Standard wood-framed exterior wall, uninsulated | Yes | Classic retrofit candidate |
| Drywall in good condition | Yes | Patches cleanly with 1 1/8-inch hole |
| Empty cavity confirmed by probing | Yes | No existing insulation to displace |
| Single-story or accessible wall height | Yes | Standard ladder works |
| Fire blocking present but locatable | With care | Drill additional holes above/below |
Conditions that favor hiring a pro:
| Condition | Pro recommended? | Reason |
|---|---|---|
| Unknown wall construction | Yes | Can't confirm cavity access or fill path |
| Historic plaster in good condition | Yes | Drilling risks irreversible cracking |
| Evidence of moisture intrusion | Yes | Cellulose holds moisture; must fix source first |
| Lead paint or asbestos suspected | Yes | Drilling creates hazardous dust |
| Walls already partially insulated | Consult | Existing material may block fill or reduce benefit |
| Dense fire-blocking pattern | Consult | May need many extra holes; pro equipment more efficient |
When to Call a Pro: Contact a certified insulation contractor if you encounter any of the following — moisture stains on the wall surface or framing, soft or spongy drywall, a cavity that doesn't sound hollow when knocked, a wall that abuts a garage (fire-separation requirements may apply), walls in a home built before 1980 where you haven't tested for lead paint or asbestos, or wall assemblies on a historically designated property.
On the tax-credit side: a pro-installed job may actually be easier to document for the IRS Form 5695 claim, since contractors typically provide product data sheets confirming the insulation meets Energy Star specifications. IRS rules require installation in your main U.S. home — a contractor invoice with product details gives you a clean paper trail. DIY installations can still qualify, but you'll need to retain your own product receipts and spec sheets.
DOE confirms that dense-packed cellulose provides air-sealing benefits within the stud bay, but it doesn't address leakage at rim joists, between floors, or at roof transitions — so even a flawlessly executed wall retrofit is one piece of a larger air-sealing strategy, not a complete envelope fix on its own.
Red flags that mean you need a pro or a different insulation approach
Stop the project and consult a professional before drilling if any of these conditions apply.
Red-flag checklist:
-
Lead paint: Homes built before 1978 may have lead-based paint on walls. Drilling creates lead dust — a serious health hazard for adults and a critical one for children. Test with a 3M LeadCheck swab before doing any drilling. If positive, hire an EPA-certified Renovation, Repair, and Painting (RRP) contractor.
-
Asbestos-containing materials: Homes built before the mid-1980s may have asbestos in wall texture, joint compound, or even certain insulation products already in the cavity. If you're uncertain about your home's history, hire a certified asbestos inspector before cutting any holes.
-
Moisture intrusion: Wet or previously wet wall cavities are not candidates for cellulose retrofit. Cellulose is treated for fire and pest resistance, but sustained moisture causes it to compress and lose R-value — and it can support mold growth if the moisture source isn't eliminated first. Fix the leak, dry out the assembly, then insulate.
-
Historic plaster: Original plaster-and-lath in a historic home is fragile and irreplaceable. The vibration and stress of drilling can crack plaster keys beyond the immediate hole area. If you own a home on the historic register or care about preserving original plaster, this is pro territory. DOE air-sealing guidance specifically notes that vapor and air barrier decisions in older assemblies should involve professionals familiar with efficient construction in the area.
-
Unknown wall construction: SIPs panels, double-stud walls, ICF, structural masonry, and diagonal sheathing assemblies don't behave like standard stud-bay framing. If you drill a hole and the cavity doesn't behave as expected — you hit material immediately, or the probe travels at an odd angle — stop. DOE's wall-retrofit measure guide explicitly limits the closed-cavity retrofit approach to walls where the cavity is accessible and confirmable.
-
Dense or irregular fire blocking: Occasional mid-wall fire blocking is manageable with extra holes. But some older homes — particularly balloon-frame construction from the late 1800s through early 1900s — have open cavities that run from basement to attic without any horizontal blocking, meaning one stud bay can be 20+ feet tall. That's a different engineering challenge than a standard 8-foot wall, and it requires professional equipment and technique.
-
Electrical or structural concerns: If accessing the wall requires moving or exposing electrical wiring or structural members, local permits and code compliance (IRC code in most U.S. jurisdictions) may apply. Cellulose installation itself typically doesn't require a permit, but any associated electrical work does.
-
Attached garages: Walls between living space and an attached garage are fire-separation assemblies under IRC code. Any modification to these walls — including drilling — should be reviewed against local fire codes before proceeding.
How to improve wall performance beyond cellulose insulation alone
Filling the wall cavity with cellulose raises the thermal resistance (R-value) of that assembly — a standard 2×4 wall with dense-pack cellulose reaches roughly R-13 to R-15; a 2×6 wall can reach R-21. But the wall is only one part of your building envelope, and as DOE states, "Minimizing air movement in and out of a house is key to building an energy-efficient home."
Air sealing and weatherstripping checklist:
- [ ] Weatherstrip exterior doors — replace worn door sweeps and compression weatherstripping. A drafty door undercuts wall insulation gains immediately.
- [ ] Caulk window perimeters from the interior — use paintable latex caulk around window and door trim where it meets the wall surface.
- [ ] Seal electrical outlets and switches on exterior walls with foam gaskets behind the cover plates. These small gaps are disproportionately significant air-leak sources.
- [ ] Address rim joists — the framed band at the top of the foundation wall is one of the largest single air-leak locations in most homes; use rigid foam board cut-to-fit and spray foam to seal it, separate from wall cavity work.
- [ ] Check attic air sealing — bypasses through top plates into the attic (around wiring, plumbing, and framing) can make wall improvements feel less effective than they are.
On vapor barriers:
Whether to add a vapor barrier depends on your climate zone. In cold climates (Zones 5–8 under the DOE map), a vapor retarder on the warm-in-winter side of the wall helps manage moisture drive. In mixed or hot climates, the wrong vapor barrier in the wrong location can trap moisture. DOE is explicit that vapor and air barrier placement is climate-dependent and should involve a professional familiar with efficient construction in your area. For most retrofit cellulose projects through existing drywall, a separate vapor barrier isn't added — the cellulose itself provides some hygric buffering, and the existing wall assembly handles the rest. But if you're in an extreme cold climate and doing a major renovation, ask an energy auditor to weigh in before you close the walls.
Cellulose's air-sealing benefit within the stud bay is a genuine bonus — DOE confirms it reduces infiltration within the cavity itself — but it's not a substitute for sealing the other air pathways that bypass the insulated wall entirely.
FAQ about retrofitting cellulose insulation in existing walls
Can you put cellulose insulation in existing walls?
Yes. Cellulose can be blown into existing closed wall cavities through two small holes per stud bay — one near the bottom and one near the top — using a rented insulation blower. This Old House's retrofit guide confirms this is achievable without major demolition in most standard wood-framed homes. The main prerequisites are an accessible wall surface, empty cavities, no hazardous materials, and the willingness to patch 1 1/8-inch holes after filling.
How do you insulate existing walls without removing drywall?
The drill-and-fill method described in this article is the primary approach: drill two access holes per stud bay with a 1 1/8-inch spade bit, insert a fill hose from a rented insulation blower into the lower hole, and pack cellulose into the cavity until the blower motor strains. Then patch, caulk with silicone, and nail the plug in place. The entire process leaves only small patched holes rather than removing and replacing the wall surface.
Is blown-in cellulose good for old houses?
For many old houses, yes — particularly balloon-frame and platform-frame homes from the early to mid-20th century that were built without wall insulation. Cellulose is made from recycled newspaper treated with fire retardants, so it's compatible with historic wood framing. However, old houses with original plaster-and-lath walls, suspected lead paint, asbestos-containing materials, or unusual framing require professional assessment before drilling. The retrofit method works best when the wall construction is understood and the cavity is clearly accessible.
How much does it cost to insulate existing walls with cellulose?
DIY costs are primarily materials plus blower rental. A bag of cellulose insulation typically costs between $15 and $25 at big-box stores; a single 2×4 exterior wall stud bay (roughly 1 cubic foot) uses less than one bag. Blower rental often runs $50–$150 per day, and many retailers discount or waive it with a minimum bag purchase. A full exterior wall in a standard-sized room might use 8–15 bags. Professional installation costs vary by region, wall accessibility, and whether access is from interior or exterior, but a contractor-installed job may simplify tax-credit documentation — ENERGY STAR confirms insulation upgrades can qualify for up to $1,200 in federal tax credits in a single year, and combining insulation with a heat pump upgrade could push your total annual credit toward the program maximum. File via IRS Form 5695 for the year the insulation is installed.
Sources & References
- This Old House — How to Retrofit Cellulose Insulation — Primary source for the two-hole drill-and-fill method, tools list, and fill/patch procedures
- U.S. Department of Energy — Wall Air Sealing Measure Guide — Technical framework for closed-cavity retrofit options including dense-packed cellulose
- U.S. Department of Energy — Energy Efficient Home Improvement Credit: Insulation and Air Sealing — Dense-pack cellulose air-sealing benefits and credit eligibility context
- U.S. Department of Energy — Air Sealing New Home Construction — Air sealing principles, vapor barrier guidance, and whole-assembly performance
- IRS — Energy Efficient Home Improvement Credit — Eligibility rules: existing U.S. main home, installation-year timing requirement
- IRS — About Form 5695, Residential Energy Credits — Filing instructions for claiming insulation tax credits
- ENERGY STAR — Federal Tax Credits: Insulation — Up to $1,200 annual credit for qualifying insulation upgrades; combination credit information
Keywords: dense-pack cellulose, drill-and-fill retrofit, 1 1/8-inch spade bit, insulation blower rental, stud bay, fire blocking, silicone caulk, galvanized finishing nails, weatherstripping, air sealing, R-13, R-15, R-21, IRC code, lead paint, asbestos