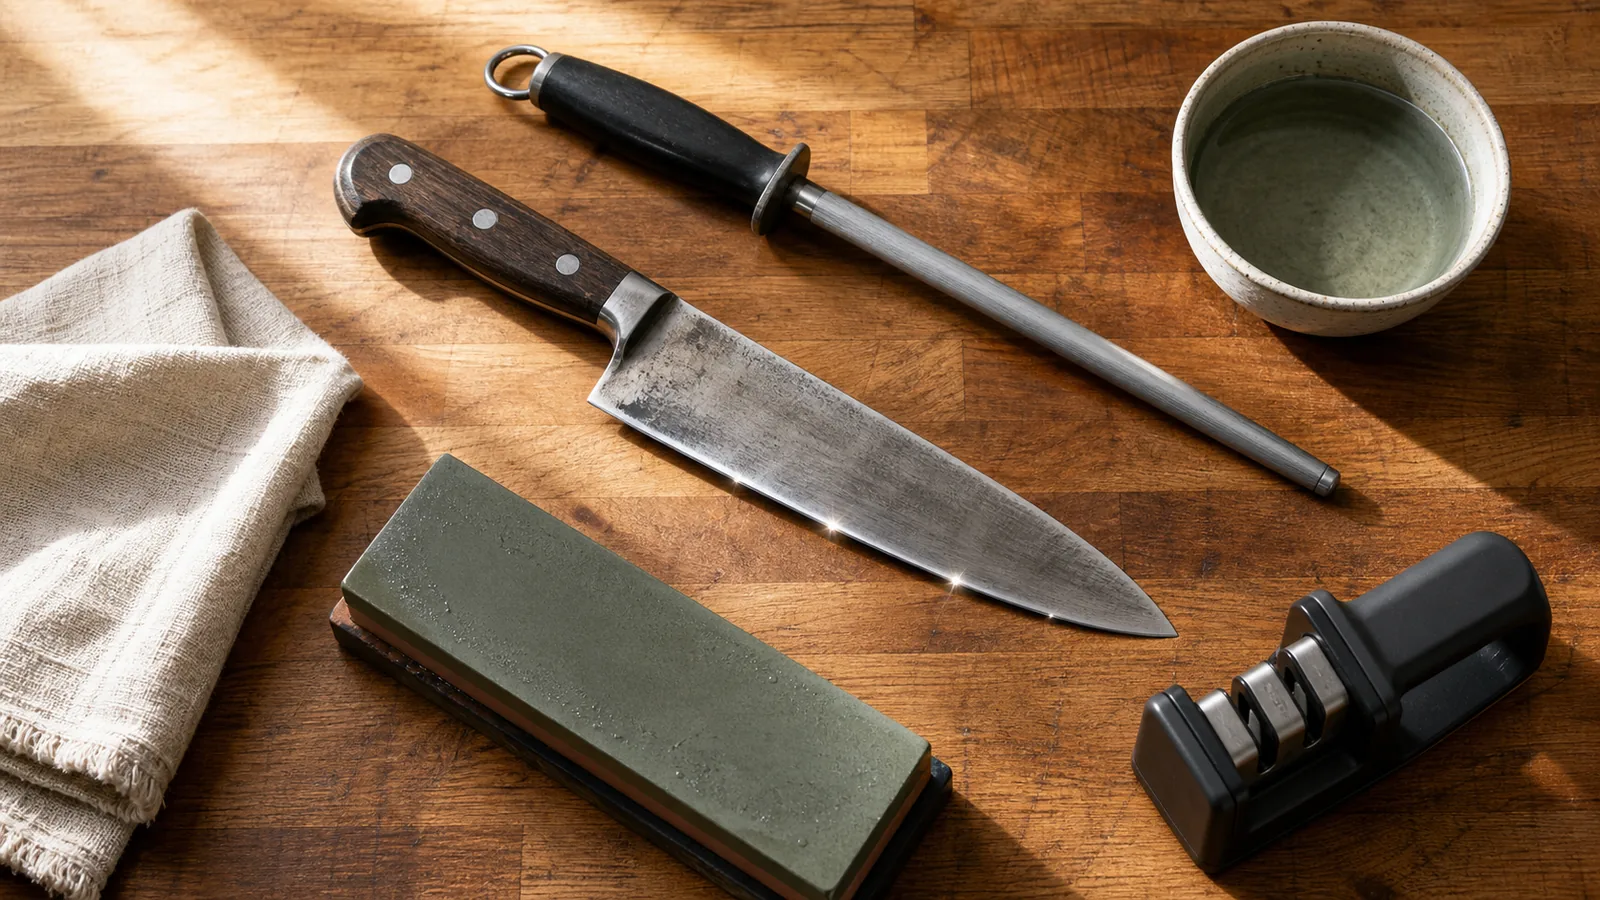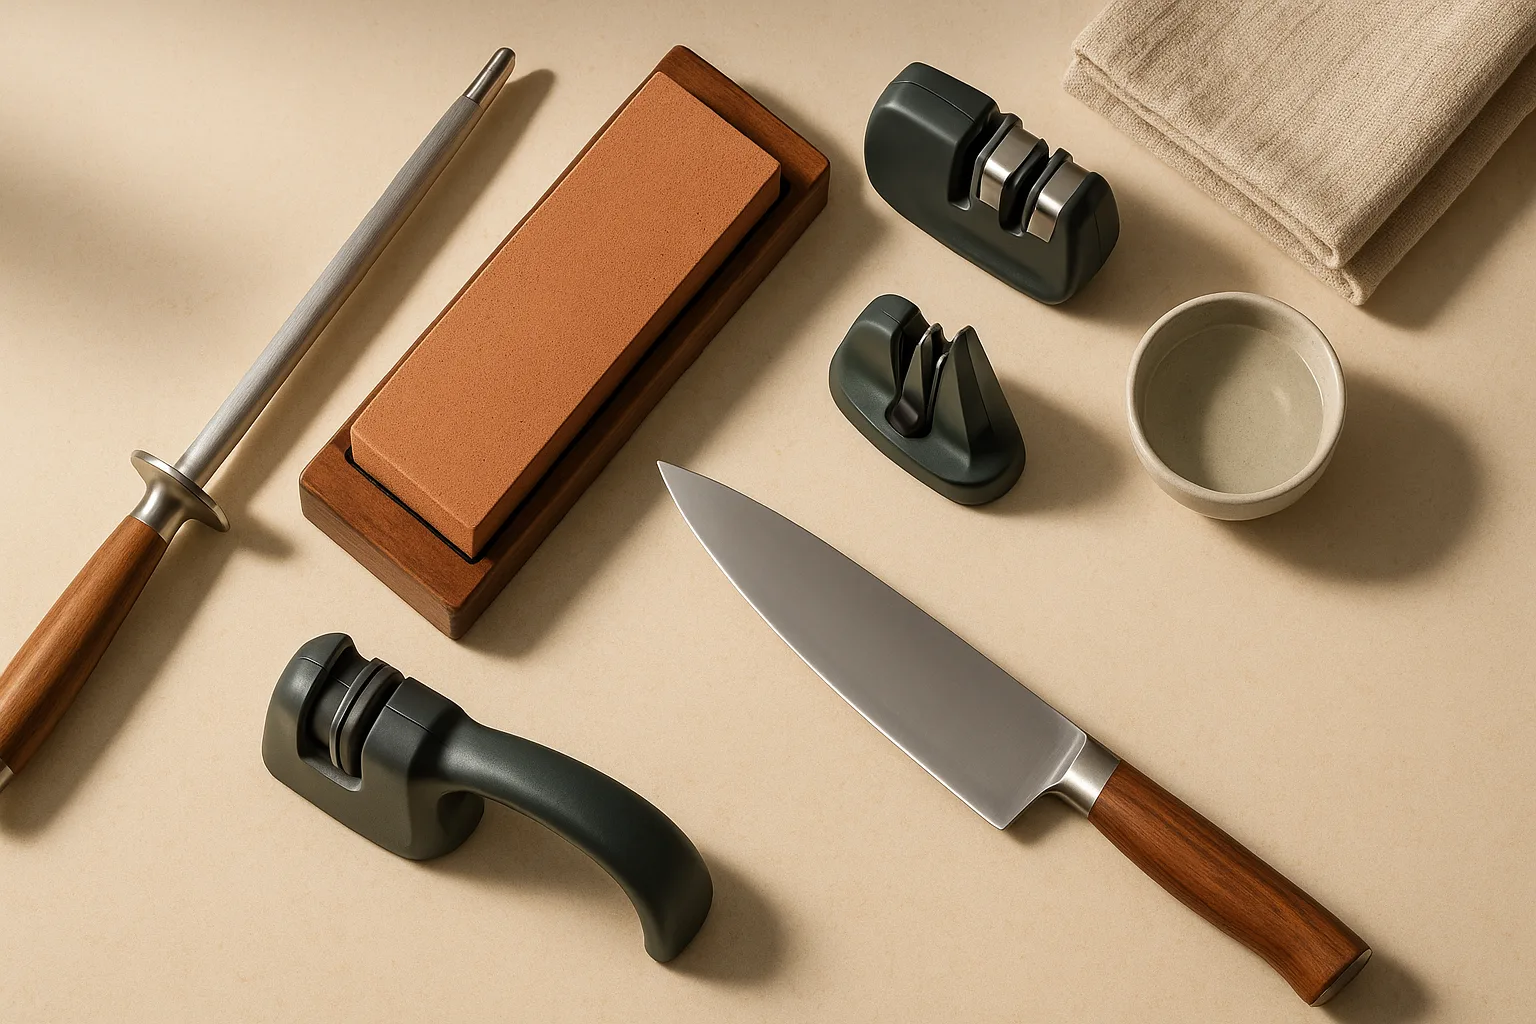
A sharp knife is safer, faster, and more pleasant to use than a dull one — and keeping your blades in shape doesn't require a professional service call every few months. What it does require is knowing which tool to reach for, because using the wrong one at the wrong time can set your edge back instead of improving it. Here's the practical breakdown.
Honing vs sharpening: what each knife tool actually does
These two words get used interchangeably, but they describe completely different actions with different tools and different outcomes.
Honing realigns. Sharpening removes metal.
When you use a kitchen knife regularly, the microscopic teeth along the cutting edge fold over or drift out of alignment. The knife feels dull, but the steel is still all there — it's just misaligned. A honing steel pushes those teeth back into line without removing metal. As WÜSTHOF Australia's knife-care guidance explains: "A honing steel will re-align the microscopic teeth and can be used frequently — even after each use."
Sharpening, by contrast, grinds away steel to create a brand-new edge. You do this when the edge has become so worn, rolled, or chipped that realignment won't fix it. Per WÜSTHOF's sharpening guide, a honing steel is for regular maintenance, not for restoring a blade that has genuinely gone dull.
At a Glance: - Honing steel: Straightens a misaligned edge — fast, no metal removal, use often - Whetstone or pull-through sharpener: Grinds a new edge — slower, removes steel, use only when honing stops helping
Quick-use rule: If the knife was cutting well last week and feels slightly off today, hone it. If you can't remember the last time it slid through a ripe tomato without pressing, sharpen it.
Which knife tool to use based on edge condition and skill level
The biggest gap in most knife-care advice is that it explains how to use each tool without telling you which one to pick first. Here's a decision matrix that maps tool to situation.
| Tool | Best when… | User skill needed | Risk if misused |
|---|---|---|---|
| Honing steel | Edge is slightly dull from regular use | Beginner–intermediate | Minimal if angle is held; no metal removed |
| Whetstone | Edge is genuinely dull, or honing no longer helps | Intermediate–advanced | Can thin or round the edge if angle is inconsistent |
| Pull-through sharpener | Edge is dull and you need a fast result with no freehand skill | Beginner | Removes more metal than needed; can alter edge geometry |
WÜSTHOF's sharpening collection treats these as distinct tool categories for a reason — each handles a different phase of edge maintenance.
For angle-sensitive knives, an angle-select sharpener like the Chef'sChoice AngleSelect M1520 handles both 15° and 20° class knives with 100% diamond abrasives and a three-stage system, making it a forgiving power option for a busy household. On the manual side, the Smith's Adjustable Angle Pull-Through Knife Sharpener gives you three preset angles — 15°, 20°, and 25° — so you can match the factory angle rather than guessing.
WÜSTHOF also recommends a Whetstone Guide Slider for beginners working on a stone, which clips onto the spine and holds the 14° angle automatically. That one accessory eliminates the single hardest part of freehand sharpening for most home cooks.
When a honing steel is the right maintenance tool
Reach for a honing steel when your kitchen knives are in good shape but starting to feel less responsive after a few cooking sessions. This is maintenance, not repair.
A honing steel works best on knives that have a well-established edge that hasn't fully broken down — think a chef's knife or slicing knife you use several times a week. WÜSTHOF's guidance permits honing "even after each use," which tells you this is a low-risk, high-frequency tool. The caveat: a honing steel cannot fix a blade that has rolled over completely or lost its bevel. If your knife is dragging through soft bread or can't bite into a tomato skin without slipping, honing won't rescue it. You need actual sharpening.
Watch Out: Using a honing steel on a seriously dull knife is the maintenance equivalent of ironing a shirt that's been through a shredder. The wrinkles aren't the problem — the steel is gone, and no amount of realignment will help.
Also note that a ceramic honing rod is more abrasive than a smooth steel rod and removes a small amount of metal with each pass. If your knife collection includes thin Japanese blades with hard steel, a smooth or lightly ribbed steel rod (rather than a heavily ridged or ceramic rod) reduces the risk of micro-chipping.
When a whetstone is the better choice for a dull edge
A whetstone is the right tool when honing no longer restores your edge — when you've run the blade down the steel a few times and it still won't bite cleanly. At that point, the edge has deteriorated beyond what realignment can fix, and you need to grind a fresh bevel.
For a beginner-safe setup, start with the stone stable on a holder or nonslip base, keep water beside you, and work in a short, repeatable sequence rather than improvising stroke by stroke. WÜSTHOF's whetstone lineup includes two-sided combinations: a 1000/3000-grit stone and a 3000/8000-grit stone. As WÜSTHOF describes it: "The coarse side is used to smooth off any unevenness while the finer grit is used to hone and sharpen your knife." For most households starting from a neglected-but-not-chipped blade, the 1000/3000 combination handles the full job. If the knife is already reasonably sharp and just needs refinement, the 3000/8000 combination is enough.
Starter stone recommendation path: - Noticeably dull, no chips: Begin on 1000 grit, finish on 3000 - Reasonably sharp, wants polish: Start on 3000, finish on 8000 - New to stone sharpening: Add WÜSTHOF's Whetstone Holder for stability — the manufacturer explicitly recommends it for additional stability during sharpening
StepCard workflow: 1. Set up the stone: Place the whetstone on a holder or damp towel so it cannot slide, then keep a small bowl or spray bottle of water within reach. 2. Work the coarse grit first if the edge is dull: Use the 1000 side to re-establish the bevel and create an even cutting edge. 3. Move to the medium grit: Switch to the 3000 side to refine the scratch pattern and reduce the burr. 4. Finish on the fine grit if your stone has one: Use 8000 for polishing and the cleanest slice. 5. Clean the blade and stone: Wipe the knife dry and rinse the stone slurry away before storing everything.
The learning curve on whetstones is real. Once you've done it a handful of times, the motion becomes much easier to repeat.
When a pull-through sharpener is the fastest safe shortcut
A pull-through sharpener is the right choice when you need results quickly and aren't prepared to learn freehand stone technique. It's the option for the home cook who uses knives heavily but isn't interested in a sharpening hobby.
The honest trade-off: pull-through sharpeners are more aggressive than they look.
DIY vs Pro: A pull-through sharpener is fine for everyday stainless workhorse knives, especially when you match the factory angle and use the lightest slot that restores the edge; bring expensive Japanese knives, chipped blades, and single-bevel knives to a professional instead.
Watch Out: Smith's own product description calls its coarse sharpening slot "designed for dull or damaged knives" — meaning the abrasives are doing significant work with every pull. Using the coarse slot on a knife that only needs light sharpening removes more metal than necessary and shortens the blade's lifespan faster than a whetstone session would.
The Smith's Adjustable Angle Pull-Through Knife Sharpener addresses one of the biggest pull-through pitfalls by offering three preset angles: 15°, 20°, and 25°. The company says the sharpener has "unsurpassed technology that allows you to sharpen the knife to the original factory angle." Matching the factory angle is the key step — a pull-through set to the wrong angle will systematically reshape your edge geometry over time.
For a more capable guided knife sharpener, the Chef'sChoice M1520 AngleSelect handles both 15° and 20° class knives in a three-stage electric system with 100% diamond abrasives. The 15° setting covers finer Japanese-style blades; the 20° setting covers standard Western kitchen knives. It costs more than a manual pull-through, but the diamond stages work efficiently on both blade families.
How to sharpen kitchen knives with a honing steel
At a Glance: - Time: 1–2 minutes - Skill level: Beginner - Tools: Honing steel, nonslip surface (damp kitchen towel works) - Best for: Routine edge maintenance, not dull-blade repair
Using a honing steel correctly takes about a minute. The keys are angle consistency and light pressure — you're not cutting into the steel, you're gliding along it.
Set the honing steel vertically and match the blade angle
Per WÜSTHOF's honing guide: "Place the honing steel pointing downwards with the tip of the steel resting on a nonslip surface." A folded damp kitchen towel under the tip works fine. Point the steel straight down, grip the handle, and hold it steady — the steel doesn't move; the knife does.
Angle guide by knife type:
- Western-style knives (WÜSTHOF, Henckels, most German-made kitchen knives): 14° to 14.5° against the steel. WÜSTHOF's official instruction is to "begin by tilting the knife so there is a 14-degree angle between the edge of the blade and the honing steel."
- Asian-styled knives (thinner blades, harder steel): 10° against the steel. WÜSTHOF's blog guide explicitly calls out this distinction: "If sharpening an Asian styled knife, tilt the knife to a 10-degree angle."
If estimating degrees by eye is difficult at first, a rough visual guide: 20° is roughly the thickness of a matchbook held at the spine; 15° is a business card; 10° is almost flat against the steel. The more you do it, the more natural it feels.
Make alternating passes without pressing hard
Start with the heel of the blade at the top of the steel, near the handle. As WÜSTHOF instructs, "gently pull the knife toward you, moving it from the back to the front of the steel" — heel to tip — while holding the angle steady throughout the stroke. When the tip clears the steel, switch to the other side of the blade and repeat.
Practical stroke count: 4–6 alternating passes per side is enough for routine maintenance. More than 10 passes per session on a well-maintained blade offers diminishing returns.
Watch Out: Don't press hard into the steel. Heavy pressure doesn't sharpen faster — it creates an uneven contact that can fold the edge in the wrong direction. The stroke should feel light, like you're slicing a thin ribbon off the steel.
Check the edge after honing and stop if it still slips
The paper test is the fastest edge check: hold a sheet of printer paper at the top and draw the knife down through it. A honed edge slices cleanly with minimal resistance. A still-dull edge tears, skips, or deflects. You can also test on a ripe tomato — the blade should bite the skin without any downward pressure. See WÜSTHOF's edge-care guidance for the same practical approach to checking whether the edge is ready.
If the edge still drags after 6–8 careful passes on the steel, honing is not the solution. The blade needs actual sharpening. At that stage, continuing with the honing steel won't build a knife edge burr (the thin wire of steel that forms when you're grinding a proper bevel on a stone), and you're not removing enough metal to matter. Move to a whetstone or pull-through sharpener instead.
How to sharpen kitchen knives with a whetstone
At a Glance: - Time: based on edge condition and practice level - Skill level: Intermediate - Tools: Two-sided whetstone, whetstone holder, water or honing oil, damp towel - Best for: Restoring a genuinely dull edge; long-term blade health
Stone sharpening is the highest-quality method available at home. It removes only as much metal as needed, gives you full control over the edge angle, and works on virtually any blade geometry. The investment is time and practice, but even a first session can produce a cleaner, more even edge than a pull-through sharpener on a moderately dull knife.
Choose a water stone or diamond stone for your first setup
For a first whetstone setup, a traditional water stone (also called a Japanese waterstone) is the most beginner-friendly option. Soak it in water for 5–10 minutes before use, and keep it wet throughout your sharpening session. No special oil required.
WÜSTHOF's whetstones are water stones sold with a Whetstone Holder included. The manufacturer says: "We recommend the Whetstone Holder, which guarantees even more stability, to accompany the Whetstone." That stability matters more than it sounds — a stone that slides around on the counter makes consistent angle-holding nearly impossible.
A diamond stone is an alternative: it cuts faster, requires less soaking (often just a few drops of water), and stays flat longer than a softer water stone. The downside is that diamond stones can be more aggressive on softer stainless steel and tend to cost more per stone. For most home cooks with German or Japanese stainless knives, a quality water stone in the 1000–3000 grit range is the smarter starting point.
Beginner starter checklist: - Two-sided whetstone (1000/3000 grit for a versatile first stone) - Whetstone holder or a rubber mat on a stable surface - Small bowl or spray bottle of water nearby - Clean cloth for wiping the blade between grits
Use the right sharpening angle for Western and Japanese knives
Angle is the single most important variable in stone sharpening. Sharpen at the wrong angle and you'll either create an edge that's too steep to cut well or too thin to hold up during normal use.
Per WÜSTHOF's official sharpening guide, the target angle for its Western-style knives is 14° against the stone (the blog version specifies 14.5°). For Asian-styled knives, WÜSTHOF drops that to 10°. The Chef'sChoice AngleSelect M1520 frames this division usefully in its product documentation: the 20° angle "provides a sturdy, long-lasting edge, ideal for everyday kitchen tasks," while the 15° angle "is designed for precision, offering a finer edge suited to knives like Damascus or high-quality carbon steel, perfect for detailed, delicate cuts."
Angle reference by knife type:
| Knife style | Target angle (per side) | Edge character |
|---|---|---|
| Western/German (stainless steel) | ~20° | Durable, general-purpose |
| WÜSTHOF (company guidance) | 14°–14.5° | Between Western and Japanese |
| Japanese / Asian-styled | 10°–15° | Finer, more precise |
Watch Out: Changing the angle on a well-established edge takes significant stone work to accomplish — the old bevel has to be ground away before the new one can form. If you inherit a knife sharpened at 20° and start sharpening it at 15°, plan for a long first session. Going forward, stay consistent with whatever angle you set.
Work through coarse, medium, and fine grit stones
Grit progression is how you move from rough metal removal to a polished, razor-sharp edge. Each stage removes the scratches left by the previous one, leaving progressively smoother metal at the cutting edge.
WÜSTHOF describes the process plainly: "The coarse side is used to smooth off any unevenness while the finer grit is used to hone and sharpen your knife."
Step-by-step grit sequence:
-
Coarse grit (1000) — Start here on a dull blade. Work one side at a time, holding your target angle, using moderate pressure. This stage removes metal and sets the bevel. Continue until you feel a burr form on the opposite side (see the next section). Switch sides and repeat.
-
Medium grit (3000) — Switch to the medium side without rinsing off the slurry; it helps the abrasive work. Lighter pressure here. This stage refines the scratch pattern left by the coarse grit and sharpens the edge further. Continue until the burr from the coarse stage is gone and a lighter burr from this stage forms.
-
Fine grit (8000) — Final polishing. Very light pressure, slow strokes. This stage removes the medium-grit scratches and produces a smooth, polished edge that slices rather than tears.
After the fine grit, a few light passes on a clean honing steel (or a leather strop if you have one) knocks off any remaining burr and aligns the freshly polished edge.
Raise and feel for a burr before switching sides
The knife edge burr — sometimes called a wire edge — is a thin flap of metal that folds over to the opposite side of the blade as you grind on the stone. Feeling for it is how you know you've done enough work on one side before switching.
To check: after working one side on the coarse stone, very lightly drag the pad of your thumb perpendicular across the flat of the blade (not along the edge — that will cut you). If the edge catches slightly or feels rough, that's the burr. It should run continuously from heel to tip. If you feel a burr only in patches, keep working the sections that don't have one yet.
Once you feel a continuous burr across the full length, switch sides. Work the second side until that burr transfers back and you feel it on the first side again. On the medium and fine grits, the burr becomes much finer — you may need to draw the blade lightly across the back of your hand's skin or a piece of newsprint to detect it.
Pro Tip: A burr that won't go away after several passes on the fine grit usually means you're applying too much pressure. Ease off significantly — almost no pressure — and take three or four very slow, light strokes on each side alternately. The burr will break off.
How to use a handheld pull-through sharpener without ruining the edge
Pull-through sharpeners are convenient and genuinely useful for the home cook who wants sharper knives without committing to stone technique. Used correctly — right knife, right angle preset, right slot — they deliver usable results without much setup. Used carelessly, they remove far more metal than needed and permanently alter the edge geometry of your best knives.
The Chef'sChoice AngleSelect M1520 is the pull-through option that handles the most common kitchen scenarios: its three-stage system covers both 15° and 20° class knives with 100% diamond abrasives, and the angle-select mechanism means you're not guessing. At the manual price point, the Smith's Adjustable Angle Pull-Through Sharpener offers 15°, 20°, and 25° presets and three slots — coarse, fine, and serrated — making it a solid, affordable starting point.
Both are guided knife sharpeners in the sense that the angle is built into the tool. You don't need to estimate anything.
Follow the slots in order and use light pressure only
-
Set the angle. Match the preset to your knife's factory angle — check the manufacturer's website or the blade's documentation if unsure. Defaulting to 20° for a standard Western chef's knife and 15° for a Japanese or Damascus blade is usually correct.
-
Start in the coarse slot only if needed. Smith's describes its coarse slot as containing "diamond stones that are used to sharpen dull or damaged knives." If your knife is only moderately dull — not noticeably struggling through food — skip the coarse slot entirely and start in the fine or finishing slot. The coarse slot removes metal aggressively.
-
Pull through with light, even pressure. Draw the knife through the slot heel-to-tip in one smooth motion. Let the abrasive do the work — don't press down. Repeat 3–5 times.
-
Finish in the fine slot. This refines the edge and removes the burr created by the coarse stage.
-
Rinse the blade to remove metal filings before using the knife on food.
Watch Out: More passes through the coarse slot do not produce a sharper knife — they produce a shorter knife. Each pass removes a measurable amount of steel. Use the minimum number of passes that produce a noticeable improvement, then stop.
Know which blades should stay out of a pull-through sharpener
Not every knife is a good candidate for a pull-through sharpener. Run the wrong blade through one and you may reshape the edge in a way that's difficult or impossible to correct at home.
No-go list:
-
Expensive Japanese knives with hard, brittle steel — Many high-end Japanese knives (Shun, Global, MAC, Japanese single-bevel knives) are ground to 10°–15° per side and made from harder steel that chips rather than rolls under aggressive abrasive contact. A standard pull-through set to 20° will systematically blunt the intended geometry. As Chef'sChoice notes, the 15° angle "is designed for precision, offering a finer edge suited to knives like Damascus or high-quality carbon steel." Even with the right angle, the diamond abrasives in a coarse pull-through slot can be too aggressive for brittle, high-hardness steel. Single-bevel Japanese knives (where only one face is ground) should never go through a pull-through.
-
A chipped blade — A chip is a divot out of the edge steel, not a misaligned edge. Pull-through sharpeners can't remove a chip — they'll create an uneven bevel around it and leave the damage in place. A chipped blade needs a coarse whetstone or a professional's belt grinder to grind below the chip.
-
Serrated bread knives — A standard pull-through cannot sharpen serrations correctly. Smith's includes a dedicated serrated slot on some models for touching up most serrated knives, but even that is limited. A professional sharpener or a specialized serration hone is the better call for a heavily worn bread knife.
-
Very thin fillet knives and flexible boning knives — The lateral flex in these blades makes consistent slot contact impossible.
How often to hone versus sharpen kitchen knives
WÜSTHOF's guidance permits honing a honing steel "even after each use" — and that's not an overstatement. Honing is fast, gentle, and has essentially no downside for a knife in good condition. Sharpening, by contrast, removes metal and should happen only when honing stops restoring the edge.
Frequency guide: hone after each use or as often as the knife starts to feel a little less responsive; sharpen only when the edge condition calls for it, not on a fixed calendar.
The simplest rule: hone often, sharpen only when honing no longer helps.
Daily and weekly honing schedule for busy home cooks
If you cook dinner most nights, a quick hone before you start is a good habit that takes under 90 seconds. As WÜSTHOF Australia states: "A honing steel will re-align the microscopic teeth and can be used frequently — even after each use." A chef's knife, slicing knife, or santoku used daily benefits from 4–6 light passes on each side before or after each cooking session.
A more relaxed schedule that still keeps knives noticeably sharper than most home cooks experience: hone your primary chef's knife before every second or third use. Even that modest cadence reduces how often you need to actually sharpen.
Monthly or seasonal sharpening schedule for most households
How often you need a full sharpening session depends entirely on how much you cook and whether you're honing regularly. A household that hones consistently and cooks dinner 5 nights a week may sharpen less often than a household that never hones at all. The trigger for a sharpening session isn't the date; it's the moment honing stops working.
WÜSTHOF's sharpening guide ties sharpening decisions to the knife's condition and the method used, rather than a fixed calendar interval — which is the honest approach.
Time-on-task estimates by method: - Whetstone (moderately dull knife): time varies with edge condition and practice - Pull-through sharpener (same knife): a short session, including coarse and fine slots - Professional sharpening service: pricing and turnaround vary by shop
When to stop and send the knife to a professional sharpener
Some edge problems are beyond what a home setup can fix efficiently or safely. Recognizing those situations saves you time, metal, and frustration.
When to Call a Pro: - The blade has a visible chip or multiple chips along the edge - The knife is a high-end Japanese blade and you're unsure of its exact angle or steel hardness - The edge has become so thin or so damaged that no home sharpening session produces a usable result - You've attempted home sharpening and the edge feels worse or uneven afterward - The blade is a single-bevel Japanese knife (requires specialized technique)
Signs the edge is too damaged for home sharpening
A chipped blade — one with visible notches, divots, or missing sections of edge steel — is a caution flag. While Smith's classifies its coarse diamond slot as appropriate for "dull or damaged knives," a chip often takes more work than a routine touch-up, and home sharpening may or may not be the fastest path depending on the size and location of the damage.
Red-flag checklist: - Visible gaps or divots along the cutting edge when viewed under good light - A knife edge burr that forms unevenly or won't remove despite careful work on fine grit - The blade feels wavy or irregular when you draw your (carefully) held fingertip along the flat above the edge - The knife tips back on itself and fails to cut at all even after two or three home sharpening attempts
Any of these signals mean a professional sharpener with a belt grinder or motorized wheel can restore the blade in minutes in a way that would take an hour or more — if it's achievable at all — at home.
Why expensive Japanese knives deserve extra caution
Japanese knives — particularly high-end options from brands like Shun, Miyabi, MAC, or traditional blacksmith-forged knives — are typically made from harder, more brittle steel than Western knives, and they're ground to finer edge angles. WÜSTHOF's own guidance distinguishes Asian-styled knives at 10° from its standard 14° edge, illustrating how significant the geometry difference is. Chef'sChoice echoes this: the 15° angle class is "designed for precision, offering a finer edge suited to knives like Damascus or high-quality carbon steel."
That harder steel holds an edge longer, but it also chips more readily than softer German stainless if subjected to heavy lateral pressure, wrong-angle sharpening, or an overly aggressive abrasive. A Western knife that gets sharpened at the wrong angle mostly loses its edge geometry over time — a recoverable problem. A hard Japanese knife sharpened at the wrong angle or with a coarse-slot pull-through can develop micro-chips along the edge that require serious grinding to remove.
DIY vs Pro: If you own a Japanese knife and you're not certain of its exact angle specification and steel hardness, send it to a professional for the first sharpening after purchase. Ask the sharpener what angle they set it to, then use that number for your future home-maintenance honing sessions. The service charge is cheap insurance for a knife you'll use for years.
Starter knife-sharpening setup for home cooks
Here are three clean starting points, one for each method. Pick the path that matches your skill level and how much you want to invest in the process.
Best starter setup for honing at home
Honing requires almost nothing to get started. WÜSTHOF's setup instruction is direct: "Place the honing steel pointing downwards with the tip of the steel resting on a nonslip surface."
Starter honing checklist: - A quality honing steel (smooth, fine-ribbed, or ceramic — matched to your knife's steel hardness) - A damp folded kitchen towel or rubber mat for the countertop (provides the nonslip surface) - Storage: hang the steel on a magnetic strip or keep it in the knife block — accessibility matters, because honing only works as a habit
Cost breakdown: - Honing steel: $25–$60 - Nonslip towel or mat: usually already on hand - Storage solution: $0–$20 depending on what you use
Cost entry point: a decent honing steel runs $25–$60. WÜSTHOF's own 10-inch honing steel is widely available at Williams Sonoma, Sur La Table, and Amazon.
Best starter setup for whetstone sharpening
This setup takes a little more investment but delivers the best long-term results.
Starter whetstone checklist: - A two-sided whetstone — 1000/3000 grit for a versatile all-in-one stone - A whetstone holder or rubber base (WÜSTHOF explicitly recommends its Whetstone Holder for stability) - A small bowl of water or a spray bottle kept nearby - Optional: WÜSTHOF's Sharpening Guide Slider, which clips to the blade spine and holds the 14° angle automatically — a significant help for beginners
Cost breakdown: - Two-sided whetstone: $60–$120 - Whetstone holder: $20–$40 - Sharpening guide slider: $10–$20 - Water or spray bottle: $0–$10
For the grit sequence: start on the coarse grit (1000) for a dull blade, refine on 3000, and add a 3000/8000 stone later if you want a finer polish on harder Japanese knives. The 1000/3000 combo handles most home-cook sharpening needs.
Best starter setup for a handheld sharpener
If convenience is the priority, a quality pull-through knife sharpener with angle presets is the right answer. As Smith's states: "GUARANTEED RESULTS — Has 3-preset 15, 20, and 25-degree sharpening angles for the perfect edge."
What to buy: - Budget manual option: Smith's Adjustable Angle Pull-Through Knife Sharpener (~$25–$35) — three slots, three preset angles, works for most standard Western kitchen knives - Electric step-up: Chef'sChoice AngleSelect M1520 (~$160–$180) — handles both 15° and 20° class knives, three diamond stages, a more guided option for home cooks who want a stronger edge without learning stone technique
Cost breakdown: - Manual sharpener: $25–$35 - Electric sharpener: $160–$180 - Replacement or maintenance accessories: varies by model and use
Caution note: Even the best pull-through sharpener is more aggressive than a whetstone. If you have expensive Japanese knives, a serrated bread knife, or a blade with existing chips, keep those out of any pull-through device and take them to a pro or learn stone technique for those specific blades. Use the pull-through for your everyday stainless workhorse knives.
FAQ about honing steels, whetstones, and handheld sharpeners
What is the difference between honing and sharpening a knife?
Answer
Honing realigns the microscopic teeth on a blade's edge without removing metal. Sharpening grinds away steel to create a new edge. As WÜSTHOF Australia explains, a [honing steel](https://www.wusthof.com.au/pages/using-a-steel) "re-aligns the microscopic teeth and can be used frequently — even after each use." A whetstone or sharpener is only needed when the edge has deteriorated to the point that honing no longer restores cutting performance.How often should you hone or sharpen kitchen knives?
Answer
Hone as often as before every use — the manufacturer guidance explicitly supports it. Most home cooks who hone regularly find they need to sharpen their primary knife only when edge performance drops. If you skip honing entirely, expect to sharpen sooner because wear accumulates faster. The trigger for sharpening is condition, not calendar: sharpen when honing stops working.Are handheld knife sharpeners bad for knives?
Answer
They aren't bad if used correctly, but they're more aggressive than most people expect. The coarse slot on Smith's adjustable sharpener is explicitly designed for "dull or damaged knives" — meaning it removes significant metal with each pull. Over time, excessive use of the coarse slot removes more steel than necessary and shortens a blade's useful life. Use the coarse slot sparingly and skip to the fine slot whenever possible. For expensive or hard Japanese-steel knives, avoid pull-through sharpeners altogether.What angle should I sharpen kitchen knives at?
Answer
It depends on the knife. [WÜSTHOF's sharpening guide](https://www.wusthof.com/pages/how-to-sharpen-your-wusthof-knives) specifies 14° for its Western-style knives and 10° for Asian-styled knives. More broadly, most Western kitchen knives (German stainless, typical chef's knives) are ground to around 20° per side at the factory. Japanese and Asian-styled knives typically run 10°–15° per side. Chef'sChoice's M1520 frames it clearly: the 20° angle gives "a sturdy, long-lasting edge" while the 15° angle delivers a "finer edge suited to knives like Damascus or high-quality carbon steel." Match your sharpening angle to the knife's factory grind whenever possible.Can you use a honing steel on a dull knife?
Answer
You can, but it won't fix the problem. A honing steel only realigns metal that's still there — it can't restore an edge that's lost its bevel through wear. If the knife is genuinely dull (not just slightly off from regular use), honing may improve it marginally, but you'll still need a whetstone or pull-through sharpener to restore full cutting performance. Run the paper test first: if the knife tears or deflects rather than slicing cleanly, go straight to sharpening.Sources & References
- WÜSTHOF: How to Sharpen Your WÜSTHOF Knives (Blog) — Primary source for honing vs sharpening distinction, angle guidance, and step-by-step honing instructions
- WÜSTHOF Australia: Using a Steel — Source for honing frequency guidance and edge-realignment description
- WÜSTHOF: How to Sharpen Your WÜSTHOF Knives (Main Page) — Angle specifications for Western and Asian-styled knives
- WÜSTHOF Whetstone J-1000/3000 — Grit combination details and coarse/fine description
- WÜSTHOF Whetstone J-3000/8000 — Grit combination details and Whetstone Holder recommendation
- WÜSTHOF Sharpening Guide Slider — 14° angle-guide product for whetstone beginners
- WÜSTHOF Sharpening Collection — Full product category for sharpening accessories
- Chef'sChoice AngleSelect Diamond Hone Sharpener Model 1520 — Three-stage electric sharpener for 15° and 20° class knives; angle and abrasive specifications
- Smith's Adjustable Angle Pull-Through Knife Sharpener — Slot and angle descriptions; coarse and serrated slot details
- Smith's 2-Step Adjustable Sharpener — Preset angle specifications (15°, 20°, 25°)
Keywords: honing steel, whetstone, pull-through sharpener, guided knife sharpener, 15-degree edge angle, 20-degree edge angle, coarse grit stone, medium grit stone, fine grit stone, water stone, diamond stone, stainless steel knife, Japanese knife, chipped blade, knife edge burr, WÜSTHOF knife-care guidance