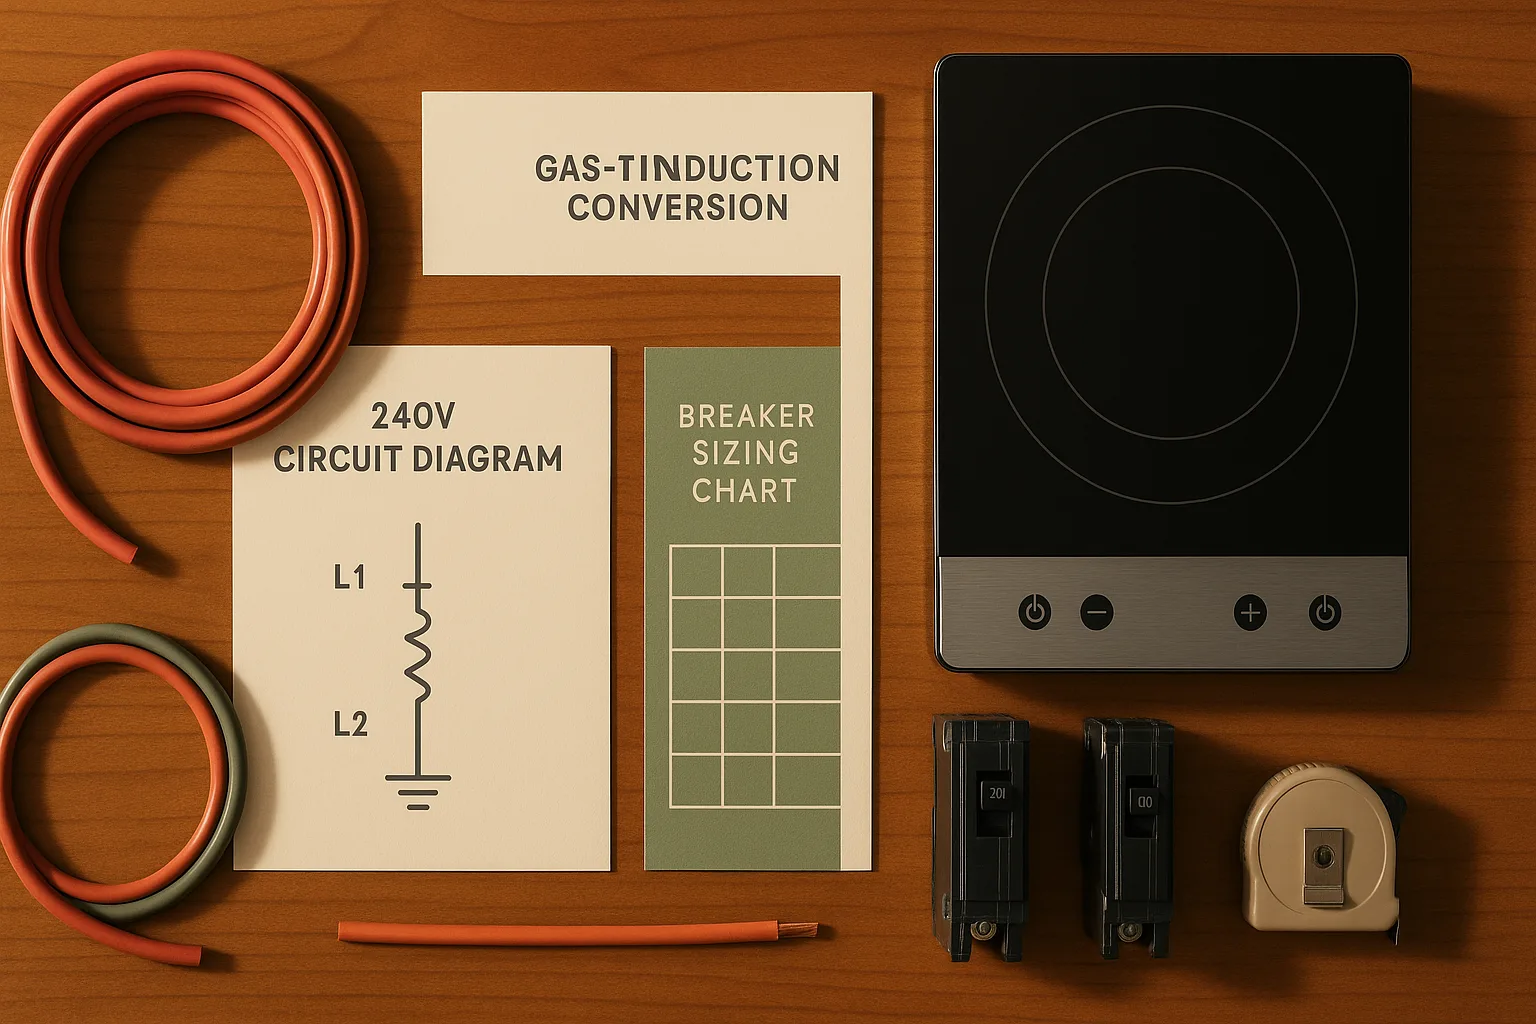
Switching from a gas range to induction is fundamentally an electrical project that happens to end with a new appliance. Before you order a single burner, you need to know whether your home's service panel has the capacity, the breaker slot, and the right wiring pathway to support a dedicated 240V circuit. Get that answer wrong and the conversion can jump from a few hundred dollars for a simple circuit run to a much larger project that includes a panel upgrade — or you'll be rescheduling the delivery truck while an electrician finishes work you didn't budget for. This guide gives you the full US wiring roadmap: what the circuit actually needs, how to size the breaker correctly, what the permit process looks like, and when the numbers stop making sense.
How much does it cost to switch from gas to induction?
The total cost of a gas-to-induction conversion stacks three separate scopes of work: electrical circuit work, any required panel changes, and the appliance installation itself. A straightforward job — short wire run, open panel slot, modern 200-amp service — often lands in the low hundreds before the appliance is added. A complicated job involving a panel upgrade or a long wire run through finished walls can move well past $3,000 before the induction range is even unboxed. Factor in the appliance itself — typically $900–$3,000 for a quality 30-inch slide-in — and you're looking at a total project cost that can run from the low four figures to the mid five figures depending on your home's starting point.
Cost Snapshot: Low complexity: roughly $500–$1,500 for electrical work and basic install, not including the appliance. High complexity: roughly $2,000–$4,500+ when circuit work, panel upgrade, and installation stack up. Appliance cost is separate and additional.
RegionalCostNote: Permit fees, electrician labor, and gas-line cap-off costs vary by jurisdiction and by home layout, so the figures here should be treated as baseline estimates rather than fixed national totals.
The unpredictability is why getting an electrician service quote before buying the range matters. You don't want a $2,800 induction range sitting in your garage while you wait for a panel upgrade that you didn't see coming.
Gas-to-induction cost breakdown by circuit run, panel work, and range install
Breaking the bill into three buckets makes it easier to understand where your money is going and which costs you can actually influence.
Bucket 1 — 240V circuit run: Installing a new 240V outlet under typical conditions runs $100–$200 according to Angi's 2026 outlet-install pricing guide, though that baseline assumes straightforward wiring conditions. A longer run through finished walls, a basement ceiling, or a conduit path that requires fishing wire can push the electrician service labor alone to $300–$600. Materials — wire, breaker, outlet or junction box — add $50–$150.
Bucket 2 — Panel work: If the panel needs a new breaker slot but nothing else, the cost is modest — typically wrapped into the electrician's trip charge. If you need an electrical panel upgrade, the numbers climb steeply. Per Angi's 2026 panel replacement guide, a full panel replacement runs $530–$2,100, a 100-amp service upgrade runs $800–$1,500, a 150-amp upgrade runs $1,300–$1,600, a 200-amp upgrade averages $1,300–$2,000, and a 400-amp service upgrade ranges from $2,000 to $4,000.
Bucket 3 — Appliance installation: Once the circuit is ready, setting the range in place is the least expensive part of the day. Delivery and basic installation from a retailer typically runs $100–$200. If a plumber needs to cap the existing gas line, budget a separate service call — usually $100–$300 depending on your area and whether the valve is accessible.
| Line Item | Low End | High End |
|---|---|---|
| 240V circuit run (labor + materials) | $150 | $750 |
| Panel breaker slot (no upgrade) | $0 | $150 |
| Panel upgrade (if needed) | $530 | $4,000 |
| Permits (varies by jurisdiction) | $50 | $300 |
| Appliance install (delivery + set-in-place) | $100 | $200 |
| Gas line cap-off (plumber) | $100 | $300 |
Pro Tip: Ask your electrician for a separate line-item quote for the circuit run versus any panel work. If you're comparison-shopping, bundled quotes make it impossible to see where the real cost driver is.
When a conversion stays under budget and when it jumps to a panel upgrade
The cleanest conversions share three traits: the service panel is already 200 amps, there's an open double-pole breaker slot, and the kitchen is close to the panel — meaning a short, accessible wire run. In these homes, the entire electrical scope often lands under $400, and the job can be permitted and finished in a single day.
As Angi explains, "Upgrading your electrical panel becomes necessary when you add power-hungry appliances, notice frequent breaker trips, or your home still uses an outdated fuse panel." That's the threshold where your conversion shifts from a circuit job to an electrical panel upgrade project.
DIY vs Pro: Short wire run + open slot + 200-amp service = straightforward circuit job, electrician service only. Fuse panel, 100-amp service, or zero open slots = panel upgrade territory, with costs starting at $530 and potentially exceeding $2,000 before any circuit work begins.
The practical decision point: if your panel is a 100-amp service in a home built before 1980, or if you're already running an electric dryer, electric water heater, and central air on a 150-amp panel, the induction range may be the load that tips you into an upgrade. Get that panel evaluation before you swipe the card on the appliance.
Does an induction range need 240V?
Yes — the verified manufacturer examples here all show full-size induction cooking equipment using 240V. The GE Profile 30-inch induction range is rated for 240V, Bosch's installation instructions call for a 120/240V or 120/208V circuit, and Frigidaire's support materials show a 240V/40A minimum circuit for its electric range example. Induction cooking uses electromagnetic coils to generate heat directly in the cookware, and those coils draw significantly more power than a microwave or a standard 120V household circuit can supply.
The practical implication: you cannot plug an induction range into a standard 120V receptacle. The range needs its own dedicated 240V branch circuit wired from the service panel, using the correct wire gauge and breaker size for the appliance's rated amperage.
How to read the rating plate and installation manual before you buy
The rating plate — typically a metal label on the back or underside of the appliance — tells you everything you need to verify before ordering. Check it against your home's existing wiring before the delivery truck shows up.
What to confirm before purchase:
- Voltage: Should read 240V (sometimes listed as 240/208V for commercial-compatible models)
- Amperage: The amp rating at 240V — common values are 40A and 50A, but check your specific model
- Minimum circuit required: Often stated separately from the raw amp draw; this is the breaker size floor
- Hardwire vs. receptacle: Some ranges hardwire directly; others use a 50A range outlet (NEMA 14-50)
- UL Listed or ETL Listed: Required safety certification for all US-market appliances
- ENERGY STAR certification: Worth confirming if you're planning to claim utility rebates
GE Appliances makes installation instructions and owner manuals available for download by model before purchase. Bosch, Frigidaire, Samsung, and most major brands do the same. Download the installation manual for the specific model you're considering — not a related model, the exact one — and bring it to your electrician. As GE notes, "Save time, money, and paper! Download a digital copy of your owner's manual, use and care manual, installation information, and energy guides." The installation manual is the authoritative document; the spec sheet on the product listing page sometimes omits key wiring details.
Watch Out: Do not rely on the retailer's spec page for electrical requirements. The condensed listing often shows only the rated wattage, not the minimum circuit amperage the NEC requires you to wire for.
240V vs 120V and why gas conversions usually cannot reuse the old circuit
A gas range typically has one small 120V cord — used only to power the clock, oven light, and spark ignitors. That's a standard household circuit, often 15 or 20 amps, entirely separate from the gas supply line. It has nothing in common with what an induction range needs.
As Bosch's installation instructions state directly: "The range requires a minimum of a three-wire 120/240 V or 120/208 V, 40 - 50 A, 60 Hz AC circuit." A GE Profile 30-inch induction range is rated at 40 amps at 240V. A GE Profile 36-inch induction cooktop is rated at 50 amps at 240V. A Frigidaire 30-inch electric range specifies a minimum circuit of 40 amps at 240V.
| Hookup Type | Gas Range | Induction Range |
|---|---|---|
| Voltage | 120V (clock/igniters only) | 240V dedicated circuit |
| Amperage | 15–20A | 40–50A (model-specific) |
| Circuit type | Standard shared | Dedicated branch circuit |
| Wire gauge | 14 or 12 AWG | Sized to the appliance manual and electrician calculation |
The 120V gas cord is not upgradeable into a 240V induction circuit. It's a different circuit entirely, and the old wire path — even if it runs to the same wall location — will almost certainly be the wrong gauge for 40–50 amps. A licensed electrician needs to verify the existing conductor before assuming any reuse is possible.
What breaker size do you need for an induction range?
Most residential induction ranges require either a 40-amp breaker or a 50-amp breaker, but the correct answer for your specific appliance is on the nameplate and in the installation manual — not in a generic chart. The GE Profile 30-inch range runs on a 40-amp circuit; the GE Profile 36-inch cooktop requires 50 amps. Bosch specifies a 40–50A range. Frigidaire's 30-inch model calls for 40 amps minimum. Those differences matter because the breaker size governs the wire gauge, and the wire gauge drives materials cost and installation complexity.
The National Electrical Code (NEC) — NFPA 70, enforced in all 50 states — sets the framework for how these circuits must be built. The specific rule that governs branch-circuit sizing is NEC 210.19 and 210.20.
How amperage, continuous load, and wire gauge determine the breaker
Here's the core NEC rule that governs this calculation. Per EC&M's explanation of NEC 210.19(A)(1): "A branch-circuit for an appliance that's a continuous load must be rated not less than 125% of the marked ampere rating of the appliance."
In plain terms: if the range nameplate says 40A, the branch circuit must be rated for at least 125% of 40A. If the nameplate says 50A, the branch circuit must be rated for at least 125% of 50A. Your electrician uses that calculation, plus the manufacturer instructions, to choose the breaker and conductor.
How wire gauge maps to amperage (illustrative examples only):
- 12 AWG copper — commonly used on 20A circuits; not suitable for an induction range circuit unless the appliance manual and electrician calculation somehow say otherwise, which is rare.
- 10 AWG copper — commonly used on 30A circuits; not suitable for a 40A or 50A induction circuit in the typical residential setup.
- 8 AWG copper — often used on 40A to 50A circuits when the appliance instructions and the electrician's load calculation support it.
- 6 AWG copper — often used when the required ampacity and run length push the design beyond what 8 AWG can safely cover.
Watch Out: The 12-gauge wire that fed your gas range's 20A clock circuit cannot serve a 40A or 50A induction range. Running a high-draw appliance on undersized wire is a fire hazard and a code violation.
Wire gauge decisions must also account for the length of the run. Longer runs can cause voltage drop that requires stepping up to heavier wire even when the amperage alone might permit a lighter gauge. This is another reason to let the electrician calculate, not guess.
Why the installer should match the breaker to the nameplate, not guess
There is no single universal breaker size for induction ranges. As EC&M notes in its NEC branch-circuit guidance, "Listed appliances come with installation instructions from the manufacturer, and sometimes the minimum overcurrent protection and or conductor size are marked on the appliance." That marking or the installation manual is the governing specification — not a neighbor's installation, not a forum post, not the retailer's floor model.
The practical stakes: a 40A breaker on a range that requires 50A will trip under normal cooking loads. A 30A breaker on a 40A circuit is a code violation. An oversized breaker on undersized wire is a fire risk. The National Electrical Code exists specifically to prevent these mismatches, and a licensed electrician working from the appliance's installation manual is the only reliable way to get this right.
When to Call a Pro: Any breaker sizing, wiring, or panel work on a new 240V circuit should be handled by a licensed electrician. This is not a jurisdiction-by-jurisdiction suggestion — it's a code-compliance and safety baseline.
Can your electrical panel handle an induction range?
Panel capacity is the question most competitors skip entirely, and it's the one most likely to surprise you with a four-figure bill. Adding a 40–50A dedicated circuit to your service panel only works if three conditions are true: your panel has an open double-pole breaker slot, your total service amperage has enough headroom for the new load, and your existing large loads don't already push the panel near its limit.
Per Angi, "Most modern homes require a 200-amp service to run efficiently." If your home is on 100-amp service — common in houses built before 1970 — adding a 40–50A induction circuit may not be feasible without a service upgrade. Even a 150-amp panel needs a careful load calculation before you commit.
[Image: Decision tree — panel capacity check for gas-to-induction conversion]
Panel compatibility decision flow:
- 200-amp service + open slot + manageable existing loads → Add a dedicated 40–50A circuit. Cost: circuit run only.
- 200-amp service + no open slot → Tandem breaker may be possible (ask electrician) or minor panel reconfiguration. Cost: moderate.
- 100- or 150-amp service → Load calculation required. Upgrade likely needed. Cost: $800–$2,000+.
- Fuse panel or outdated equipment → Full panel replacement required before any new circuit work. Cost: $530–$2,100 for the panel, plus circuit run.
The 80-percent rule is the practical circuit-sizing ceiling: NEC guidance says continuous loads should not exceed 80 percent of a circuit's rated capacity, but panel headroom still comes down to a licensed electrician's load calculation and the total connected load in the house. If your 200-amp panel is already running a central AC system, an electric water heater, an electric dryer, and an EV charger, the math may not leave room for a new kitchen circuit without relief somewhere.
How to check panel space, service size, and existing big loads
Walk to your service panel before you do anything else. This is a look-but-don't-touch inspection — you're reading labels, not touching wires.
Panel-check checklist:
- Service amperage: Look for the main breaker label — typically "100A," "150A," or "200A." If it says "60A" or there's a fuse block instead of a main breaker, budget for a panel upgrade.
- Open double-pole slots: A 240V circuit needs two adjacent slots. Count empty slots. If the panel is full, that's a constraint your electrician needs to solve.
- Existing large 240V loads: Note every double-pole breaker already in place — central AC, electric dryer, electric water heater, electric furnace backup, EV charger, workshop circuits. Each one competes for service capacity.
- Breaker condition: Older panels from brands like Federal Pacific (Stab-Lok) or Zinsco have known reliability problems. If you have one, flag it to your electrician before discussing the induction project.
- Panel age and brand: A licensed electrician should evaluate panels more than 25–30 years old regardless of available slots.
As Angi points out, upgrading becomes necessary "when you add power-hungry appliances, notice frequent breaker trips, or your home still uses an outdated fuse panel." All three of those signals apply directly to the induction-conversion decision.
Pro Tip: Bring your panel photo and a list of large 240V loads to your electrician consultation. It cuts the site-visit time and gives you a faster, more accurate quote.
When a subpanel makes sense versus a full electrical panel upgrade
A subpanel is a secondary distribution panel fed from the main service panel — essentially a satellite panel that adds breaker slots without replacing the main service. It makes sense when your main panel is physically full of breakers but the overall service amperage (200A) is adequate for the added load. The electrician feeds a large breaker in the main panel to the subpanel, which then hosts the new induction circuit and potentially other future circuits.
As Angi notes, "In some cases, your electrician will install two 200-amp panels, using one of them as a subpanel." This configuration is common in homes adding multiple new circuits — an induction range, an EV charger, and a hot tub, for example — where the main panel is full but the service size is sufficient.
A full electrical panel upgrade — replacing the main panel and increasing service amperage — is the right call when the service size itself is the constraint. A 100-amp service upgraded to 200 amps runs $800–$1,500; going to 200 amps from 150 amps runs $1,300–$2,000. The subpanel route, by contrast, adds capacity without touching the utility service entrance, which keeps costs lower and avoids utility coordination.
The choice isn't always obvious. A licensed electrician's load calculation — not a YouTube estimate — determines which path is correct for your specific home. Budget a service call for that evaluation before committing to either approach.
What permit and licensed electrician rules apply to a gas-to-induction conversion?
New 240V circuit work and panel modifications are commonly permitted, but the exact requirement depends on your local jurisdiction. The National Electrical Code — NFPA 70 — is the benchmark that governs these installations. As NFPA states on its product page, it is the benchmark for safe electrical design, installation, and inspection to protect people and property from electrical hazards, and it is enforced in all 50 states. Local jurisdictions adopt the NEC (sometimes with amendments) and enforce it through permit and inspection processes.
As Angi confirms: "A new panel typically requires permits and inspections, which should be completed by a local electrician." The same principle often applies to a new branch circuit, though permit requirements vary by municipality — some require permits for any new circuit, others set a dollar threshold, and a small number have no residential permit requirement. Ask your local building department directly rather than assuming. Permit fees are jurisdiction-specific and should be confirmed locally before you budget the project.
Using a licensed electrician service is the practical guarantee that the work will pass inspection. In most states, homeowners may pull their own electrical permits for work on their own residence, but the complexity of a 240V circuit, load calculation, and potential panel work makes licensed electrician service the right call for the vast majority of homeowners.
Which parts of the job are electrical work and which are appliance installation
These are two distinct scopes — often two separate contractors, sometimes two separate visits.
Electrician scope: - Panel evaluation and load calculation - New 240V dedicated branch circuit (wire run from panel to kitchen location) - Correct breaker installation (40A or 50A per nameplate) - Outlet (NEMA 14-50 or hardwire junction box, per appliance instructions) - Permit pull and rough-in inspection scheduling
Appliance installer scope: - Delivery and unboxing - Setting the induction range in place - Connecting the range to the pre-installed outlet or hardwire connection (the electrician must have completed this first) - Leveling and anti-tip bracket installation - Test run
Plumber scope (separate trade): - Capping or disconnecting the existing gas line - This is not an electrician task, not a range-installer task, and should not be overlooked in the project plan
Watch Out: Do not let the appliance delivery crew connect the range to an outlet the electrician hasn't inspected and confirmed. The outlet must be correct for the model before the range makes contact with it.
What the permit and inspection process usually looks like
After the electrician pulls the permit, the work typically proceeds in two phases: rough-in and final.
Rough-in phase: The electrician runs the wire, installs the breaker, and leaves the terminations accessible for inspection before covering anything in the wall. The building inspector visits and signs off on the rough-in.
Final phase: The electrician completes all terminations, installs the outlet or hardwire connection, and the inspector returns for a final inspection. The certificate of completion closes the permit.
Pro Tip: Permit timelines vary widely — from same-day approvals in some rural jurisdictions to 2–3 week waits in busy urban building departments. Confirm the permit timeline with your electrician before scheduling appliance delivery. Scheduling the range delivery before the permit is finalized is one of the most common gas-to-induction project delays.
Permit-readiness checklist: - Permit pulled before any work begins - Rough-in inspection scheduled and passed - All wire runs complete and accessible for inspection - Breaker installed and panel cover temporarily removed for inspection - Final inspection scheduled before appliance connection - Permit closed and documentation saved (useful for home resale)
When is switching to induction not worth it?
The honest answer: if your panel is underpowered, the kitchen is far from the electrical room, and you're not planning a broader remodel, the conversion cost can easily exceed the appliance's value proposition. An electrical panel upgrade at $1,300–$2,000 plus a long circuit run at $600+ plus the induction range itself at $1,200–$2,800 means a total project cost that can climb into the several-thousand-dollar range for a single appliance swap. That can make sense for a forever home or an energy-efficiency renovation — it may not make sense if you're selling in three years or if your kitchen is headed for a full gut remodel in eighteen months.
A licensed electrician evaluation is the tool that tells you which scenario you're in before you've committed.
Red flags: long wire runs, crowded panels, and obsolete service equipment
Watch for these conditions before committing to the project:
Red-flag checklist:
- Panel more than 40 feet from the kitchen: Long wire runs through finished walls cost more in both labor and materials (heavier gauge wire for the longer run), and may require fishing wire through multiple wall cavities or installing surface conduit.
- 100-amp service on a home with existing large electric loads: Central AC + electric water heater + electric dryer already consumes a substantial portion of a 100-amp service. There may be no safe room for a 40–50A range circuit without an upgrade.
- Fuse panel or identified problem panels (Federal Pacific Stab-Lok, Zinsco): These require full panel electrical panel upgrade work as a prerequisite — the induction conversion becomes a secondary project behind a larger electrical safety job.
- Zero open double-pole slots: A full panel requires either a tandem solution (not always code-compliant for all circuit types), a subpanel, or a new main panel.
- Kitchen on the opposite side of the house from the panel, with no basement or crawl space access: Wire runs through finished walls on multiple floors are labor-intensive and often require opening drywall.
If two or more of these conditions apply to your home, get a full electrician evaluation and a written quote before purchasing the range.
Why remodel timing can make the conversion cheaper
Doing the electrical upgrade as a standalone project costs more than folding it into a broader kitchen remodel, for one simple reason: open walls. When a kitchen remodel strips the walls to the studs, the electrician can run wire without patching drywall, without fishing blindly through cavities, and without scheduling a second visit around the remodel timeline.
A standalone gas-to-induction conversion in a finished kitchen might require cutting drywall at multiple points, patching, and repainting — adding $200–$600 in restoration costs on top of the electrical labor. The same circuit run during a remodel adds essentially nothing to the drywall-and-paint scope because the walls are already open.
If your kitchen is 3–5 years from a planned remodel, the most financially logical move may be to keep the gas range functional until the remodel, then budget the induction conversion as part of the broader refresh. The electrician service and induction range selections stay the same — the timing just eliminates the double labor.
What happens during induction range installation day?
Installation day only goes smoothly if the electrical prep is completely finished before the delivery truck arrives. The sequence matters: electrical work first, appliance set-in-place second. Those two scopes should never overlap on the same day unless your electrician and appliance installer have coordinated explicitly.
Following the model-specific installation instructions — downloadable from GE, Bosch, Frigidaire, and most other major brands — is the governing guide for what happens once the range is in your kitchen.
Electrical rough-in and final hookup sequence
If the 240V circuit doesn't exist yet, the electrician's work comes in stages:
- Permit pulled — before any physical work begins
- Panel work — new double-pole breaker installed (size per appliance nameplate); panel load verified
- Wire run — correct-gauge wire run from panel to kitchen location through the most accessible path, sized per the appliance manual and electrician calculation
- Rough-in inspection — inspector verifies wire gauge, breaker size, and installation method before walls are closed
- Outlet or hardwire termination — NEMA 14-50 outlet installed, or hardwire junction box prepared per appliance installation manual
- Circuit verification — electrician confirms correct voltage at the outlet or junction box with a meter before signing off
Per Bosch's installation requirements, the circuit must be "a minimum of a three-wire 120/240 V or 120/208 V, 40 - 50 A, 60 Hz AC circuit." The electrician verifies this at the outlet before the range is connected.
Watch Out: Do not energize the circuit until the appliance is ready to connect. Leaving a live 240V outlet unattended in an active kitchen workspace is a safety issue, especially if the outlet is at floor level.
Range set-in-place, leveling, and test run checks
Once the circuit is confirmed live and correct, the appliance installer takes over:
Appliance installation checklist: - Anti-tip bracket: Install the bracket provided with the range before sliding the unit into position — this is a safety requirement, not optional - Cord or hardwire connection: Connect the range power cord to the outlet (or complete the hardwire connection) per the model's installation instructions; confirm the connection is secure - Slide into position: Confirm clearances on all sides match the installation manual's minimum requirements - Level the range: Adjust the leveling legs until the cooktop surface reads level in both directions; an unlevel range affects burner performance and oven bake consistency - First-heat test: Turn on each burner zone, confirm induction activation (use a steel or iron pan — aluminum, glass, and non-magnetic cookware won't respond) - Oven test: Run the oven at 350°F for 20 minutes; confirm accurate preheat and no error codes - Anti-tip verification: With the oven door open and the oven rack extended, confirm the range does not tip forward
Note any error codes or unusual behavior immediately — before the installer leaves. Consulting the model's installation manual for error code definitions (downloadable from the manufacturer's support page) is faster than a service call.
Induction conversion FAQ
Do you always need a new circuit for induction?
Almost always — but there is one exception. If your kitchen already has a dedicated 240V circuit from a previous electric range, and that circuit's wire gauge and breaker size meet or exceed what the new induction range's nameplate requires, you may be able to reuse it. A licensed electrician needs to verify the wire gauge, breaker size, and circuit condition before you assume reuse is safe.
For homes converting from gas, the existing 120V gas-range circuit cannot be reused. The 240V circuit is a different type of circuit entirely, and the gas range's 120V cord had no relationship to the gas supply line.
What size breaker do I need for an induction range?
The correct breaker size is the one specified on the appliance nameplate and in the installation manual — not a universal standard. Most residential induction ranges land in the 40-amp or 50-amp range, but the 125% continuous-load rule under NEC 210.19(A)(1) means the actual circuit rating must be at least 125% of the nameplate amperage. Confirm the exact number with your electrician and the appliance manual.
Can I replace a gas range with an induction range?
Yes, with electrical upgrades. The appliance swap itself is straightforward; the hidden work is the new dedicated 240V circuit. Depending on your home's service panel capacity and the distance from the panel to the kitchen, costs for the electrical conversion range from roughly $150 in ideal conditions with an existing compliant circuit to $4,500+ when panel work, long wire runs, and permits stack up. Budget for the electrical work before selecting the appliance.
How much does it cost to install a 240V outlet?
Under typical conditions, Angi's 2026 data puts a new 240V outlet at $100–$200 for the outlet itself, with the total circuit run (outlet + wire + breaker + labor) varying based on distance and wiring conditions. This baseline does not include panel upgrades. For a kitchen far from the panel or requiring panel work, the full circuit cost can reach $600–$1,000 or more.
Do I need an electrician to install an induction range?
You need a licensed electrician for the circuit work — the wire run, breaker installation, and any panel modifications. This is true regardless of whether you plan to pull your own permit or hire the electrician to do it. Setting the range in place once the circuit is ready is simpler; appliance delivery installers typically handle it. But anyone touching the 240V circuit, breaker, or panel should be a licensed electrician. As Angi notes, panel work in particular "requires permits and inspections, which should be completed by a local electrician."
Can you DIY the swap if you already have a 240V outlet?
DIY vs Pro: If a properly-rated 240V outlet already exists — correct voltage, correct amperage, correct wire gauge for the new range's nameplate — plugging in the range is within most homeowners' ability. Follow the installation manual exactly: anti-tip bracket first, connection second, leveling third, test run last. What you should not DIY: any breaker work, any panel modification, any new wire run, or any situation where the outlet's rating is uncertain. Those tasks stay with a licensed electrician.
Sources & References
- U.S. Department of Energy — Cooking with Electricity — DOE guidance on electric cooking and household efficiency
- Angi — Cost to Install a 240-Volt Outlet (2026) — Current outlet install cost data
- Angi — Cost to Replace or Upgrade an Electrical Panel (2026) — Panel replacement and service-upgrade pricing by amperage
- Angi — What Does It Cost to Upgrade to 200 Amps? — Permit, inspection, and upgrade-trigger guidance
- NFPA 70 — National Electrical Code (NEC) — Authoritative US electrical installation standard, enforced in all 50 states
- NFPA — NFPA 70 Product Page — NEC as the benchmark for safe electrical design and inspection
- EC&M — Branch Circuit Requirements for Appliances (NEC 210.19) — 125% continuous-load rule explanation
- EC&M — Sizing Branch Circuits for Appliances — Nameplate and manufacturer-instruction sizing guidance
- GE Profile 30" Smart Slide-In Induction Range PHS930SLSS — 240V/40A specification example
- GE Profile 36" Induction Cooktop PHP9036DJBB — 240V/50A specification example
- GE Appliances Owner Manuals and Installation Instructions — Model-specific installation documentation
- Bosch Range Installation Instructions (Document 8001203760_A) — Three-wire 120/240V 40–50A circuit requirement
- Frigidaire Electric Range Product Support — 240V/40A minimum circuit example
Keywords: 240V circuit, 50-amp breaker, 40-amp breaker, 12-gauge wire, 8-gauge wire, National Electrical Code (NEC), NEC 210.19, NEC 210.20, panel capacity, subpanel, service panel, licensed electrician, UL Listed, ENERGY STAR, induction range